Safe New Electric Circuits Practices And Live Working

Can electrical circuits be added to current fuse box?

If we do a loft conversion and add new electrical circuits, can these be added to a fuse box which was fitted in 2014 (plastic) which has space? Or does this new circuit require a new metal cased fuse box? What is required to pass building regs?

would replace the fuse board with a new metal one which is up to regulations. Your electrician may also add an additional new board separately to your old and running a separate circuit just to the loft. Without viewing your job first would enable us to advise fully.

Yes, electrical circuits can be added to a fuse box if certain conditions are met, e.g age of Installation, spare ways available, total current demand will not exceed your main fuse rating e.tc. Some Installations will meet all of these conditions especially if your Installation is Inspected and tested periodically.

It will need to comply with current regulations so you could have a separate RCD Board for the Loft conversion which means you do not have to change whole fuse board

You can add them to this board as long as the regulations at the time of installation where met. The whole board will need to be tested and certified if a new circuit is added though, so whilst this is being done it is often not a bad idea to upgrade to the latest specification board.


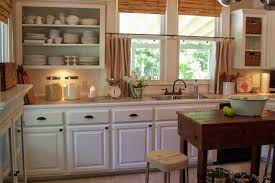
How to Design Electric Circuits and Wiring Plans for Your Kitchen

In a typical home, the kitchen has the heaviest electricity consumption. Since you need to plug in multiple appliances that have different electrical power requirements, create a wiring plan before buying construction electrical material and equipment, or building electric circuits for space.

Unlike other rooms in your home, you cannot use a single circuit to provide power to different electrical fittings and appliances in the kitchen. If you’re planning a major kitchen remodel or building a new home, common kitchen appliances will need separate electric circuits in your electrical wiring plan.

Refrigerator

While you might have a small refrigerator plugged into a general electrical circuit designed for lighting or small appliances, newer models typically require a dedicated circuit. Add a 120/125-volt, 20-amp circuit for a refrigerator in your wiring plan, and make sure you’re using 12/2 NM electrical wire with ground.

Dishwasher

Dishwashers require almost the same kind of electrical circuits as modern refrigerators with slightly lower amperage, i.e. 120/125-volt, 15-amp, and you need to use 14/2 NM electrical wire with ground. If you’re planning to power a garbage disposer with the same circuit as a dishwasher, use a 20-amp circuit. Install a slightly longer wire than needed, so the dishwasher does not need to be disconnected completely while being pulled out and serviced.

Electric Range

While a gas range uses a 120/125-volt electrical circuit, you need to install a 240/250-volt, 50-amp circuit with 6/3 NM electrical cables or #6 THHN electrical wire in a conduit for an electric range. Position the receptacle keeping in mind that the range will need to be pushed back to the wall. Even if you aren’t currently using an electric range, include a dedicated outlet for it in your kitchen wiring plan. It will help if you decide to switch to an electric range in the future, or even put your property up for sale!


How To Add A Circuit And Satisfy Your Lust For Power

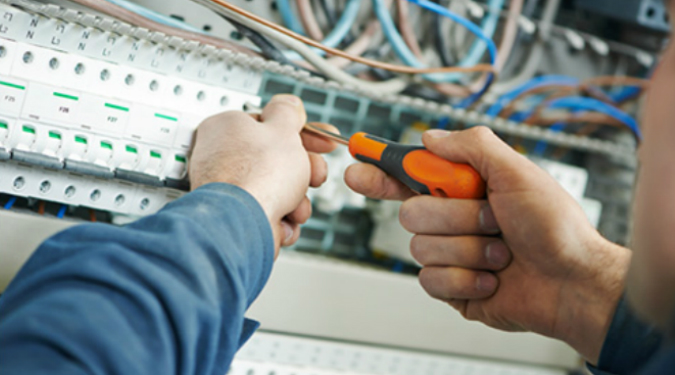
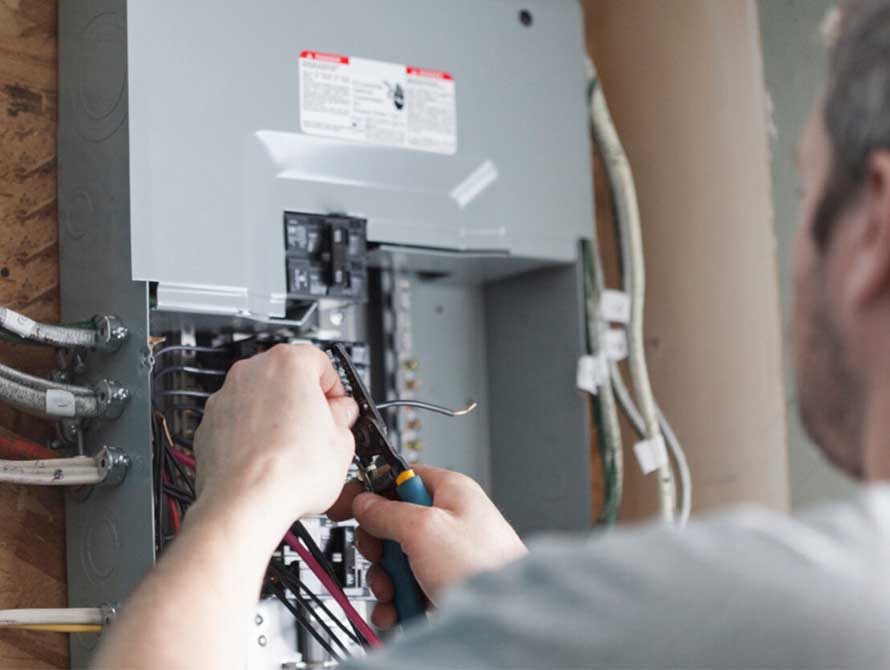
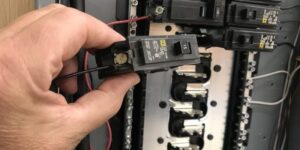
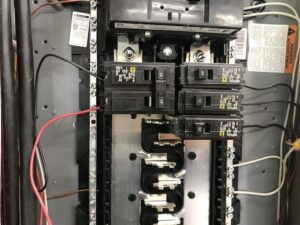
Getting nervous because the lights dim and flicker every time the fridge kicks on? Finally got that new table saw, but the breaker trips every time you fire it up? Sounds like it might be time to add a circuit. With a few simple tools and supplies, a bit of electrical knowledge, and a LOT of caution, it’s a fairly simple project. We’ll show you how to add a circuit to your existing circuit breaker.

Be aware that it can be dangerous to add a circuit. It involves removing the cover from your breaker box, and working near live wiring. If you’re not REALLY careful, it can kill you, which would likely put a damper on your whole project. If you’re uncomfortable doing this type of work, or you’re fairly accident-prone – or you really do have lights that dim and flicker – call in an electrician.

Tools And Supplies You Need To Add A Circuit

There are two types of cable, commonly known as Romex, most frequently used in household wiring. Lighting or other relatively light-duty circuits generally use 14-gauge wire. For appliances and other circuits where there will be higher current draw, 12-gauge wiring is typically used. Both are readily available at home centers and hardware stores, as are these other tools and materials.

  • Wire strippers
  • A hammer
  • A drywall saw (for old work)
  • Regular and Phillips head screwdrivers
  • Outlet boxes, either old work or new work
  • Outlets and switches for new circuit, either 15-amp or 20-amp
  • Romex cable: 14-2 for lighting circuits, 12-2 for tools or appliances
  • Wire staples
  • A cable clamp, one for each circuit being added
  • Wire nuts or push-in connectors
  • A circuit breaker compatible with your breaker box. Get a 15-amp breaker for 14-ga. wire, a 20-amp breaker for 12-ga. For outdoor or damp locations, GFCI breakers are available, and may be used in place of GFCI outlets.

I’m Not Yanking Your Chain – It’s Easy To Add A Circuit!

On a recent project, I added 25 four-foot LED shop lights in my new shop building (stay tuned, that article is up next). Even though LED lights are very energy efficient, if I’d added them all onto an existing circuit, my new nickname would probably be “Sparky.”


How to Wire a Simple 120v Electrical Circuit

Hiring an electrician is usually the best way to go where 120 volt circuits are concerned, but if you are up to it, you might save money by doing some basic electrical work yourself. This article covers the steps for installing a simple 15A (15ampere) circuit with one receptacle.

Turn off the power feeding the panel you are going to be working in. It may help to take a few minutes to familiarize yourself with all of the tips in the related wikiHow article on “How to Master Do It Yourself Electrical Safety”. Shut off all the individual circuit breakers in the panel and then shut off the main switch that supplies power to the panel. This is preferable as it is much safer to operate many smaller current devices, one at a time; than to operate a single, large current device just once. When all the smaller circuit breakers are off, the amount of current flowing through the larger 50, 100 (or more) amp circuit breaker should be zero

This wikiHow is about wiring a simple electrical circuit. It doesn’t cover the following information, which may vary depending on the type of installation you are doing, and the type of existing wiring you may be connecting to.

Choosing and installing electrical boxes.

Selecting and installing conduit.

Upgrading an existing electrical panel box to accommodate a new circuit.

Look at the following requirements that must be considered before proceeding with this project. These are beyond the scope of this article, so these items should be addressed before starting.

You will need to get and install the receptacle (junction) box. For flush installation in a drywall wall, you may choose a cut in or repair type, for other installations, a surface mounted cast aluminum or PVC weather resistant (damp location) box may be applicable.

You will need to determine the path for the wires between the receptacle box and the electrical panel box.

You will need to install conduit if you use single insulated wires.

Install the actual wires if you use a non-metallic cable (Romex).

Measure the distance from the electrical panel box to the location your new outlet will be installed, following the path you have selected, and trying to determine the actual distance the wire must run. Allow a little extra for corners, especially if you are installing in conduit, since these have ride radius curves for turning sharp angles. Also, allow at least 24 inches for hooking the wires to the breaker or fuse block and neutral and ground terminals in the panel box, and 6 or 8 inches for terminating in the receptacle box


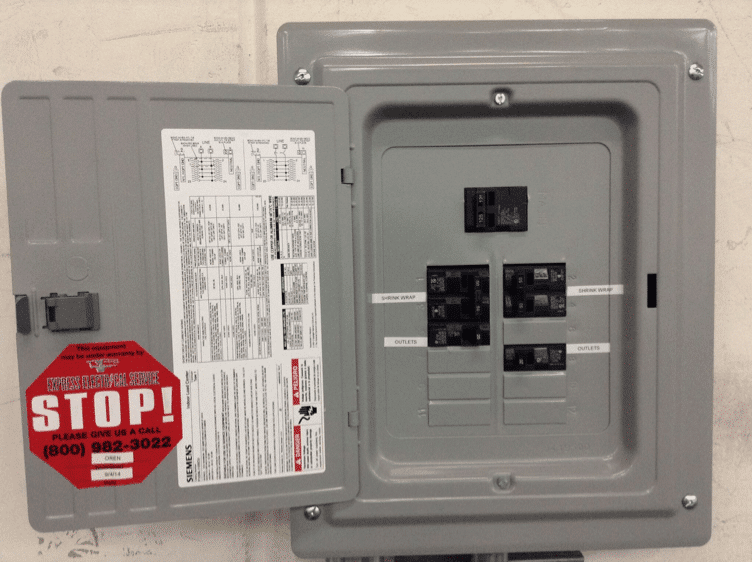
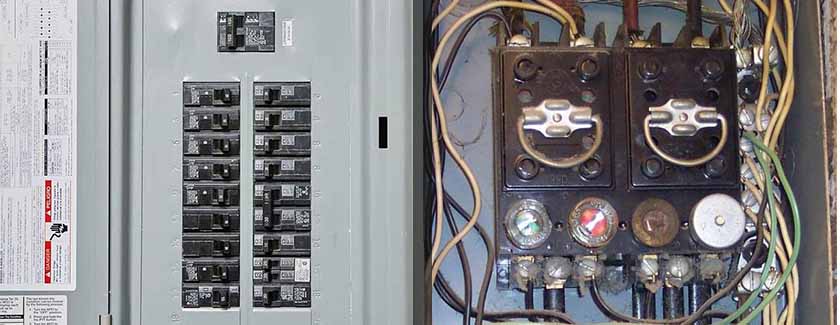
Cost to Replace a Fuse Box or Consumer Unit

Trying to find out how much a new fusebox costs? In this article we discuss the price of replacing and installing a new consumer unit in terms of labour and installation costs.

How Much Does It Cost to Replace a Consumer Unit?

The cost of replacing a consumer unit depends on how big your house is and which type of consumer unit you choose. For most homes, a high integrity consumer unit that can carry ten circuits at 100A is the best choice

Consumer Unit Prices

The cost to replace a consumer unit varies depending on the number of circuits and the type of unit

Cost Based on Number of Circuits

These prices are based on different numbers of circuits in a High Integrity consumer unit at 100A, as this is the most popular option

Labour Costs and Timescales

The cost of labour and the length of the job will depend on how many circuits your home is split into. The large your home, the more circuits there will be. Normally there are individual circuits for the lights and sockets on each floor. Then separate circuits for each bathroom and the large appliances in the kitchen. The specifics will depend on how your home was wired.

Commercial Electrical Maintenance Apprentices Get New Exam

PROFESSIONAL MASTER ELECTRICAL SERVICES

As a Registered Master Electrician, Electrical relies on robust quality assurance, health & safety, risk management, reporting and sustainability systems and processes. We are committed to the environment and assist all our customers in making informed decisions to reduce electrical consumption by utilising power saving techniques and products.

Electrical has been the local leader in commercial development and maintenance; their success is derived through accurate project planning, impeccable onsite staff and an unwavering commitment to client satisfaction. Electrical call on their vast network of creative suppliers and sub contractors to ensure that a total solution is presented to any project or maintenance contract and that no substitutes for quality or health and safety will be accepted.

business established to change the face of the volunteer travel experience. Established and now cemented right here it was an exciting project to be part of. With dynamic and aesthetically pleasing design this office space has been developed into a place of comfort by forward thinking designers

Following the completion and success of the boutique accommodation the demand increased to more beds. Leading the renovation of the old White Hart Building the Left Wing retains its industrial influence while maintaining nothing but class for service and style.

With the demand increasing on the hospitals current capacity the left wing was introduced to increase bed capacity and specialist service spaces. Electrical Ltd has held a long standing and successful relationship with spanning back nearly a decade.


WHAT ELECTRICAL WORK DO YOU NEED HELP?

OFFER A RANGE OF ELECTRICAL SERVICES FOR RESIDENTIAL PROJECTS…

If you’re building or renovating, we can help you with your electrical work and layout.  It’s important to plan all electrical work early, like what lighting design you want, where the power points should be and so on. We can help guide you through this process and in turn this will save you time and money further down the track.

ARE YOU A BUILDER LOOKING FOR A RELIABLE ELECTRICAL CONTRACTOR?

We understand the importance of getting the job done on time. Electrical are reliable, prompt, highly organised, and provide functional electrical fit-outs and maintenance services

With a team of Electrical Industry experts, Electrical are well equipped to complete your electrical work, with all the personal touch and convenience of a local company run by a passionate owner/operator.

HOUSEHOLD MAINTENANCE

FROM A WIRING CHECK TO ONGOING PROPERTY MAINTENANCE…

We provide you with a residential maintenance service that is professional and friendly. Whether you need us now, later, or on a regular basis, get it fixed promptly.

COMMERCIAL FITOUTS

ELECTRICAL PRIDE THEMSELVES IN COMPLETING YOUR COMMERCIAL WORK EFFICIENTLY AND ON TIME…

Electrical are reliable, prompt, highly organised, and provide functional electrical fitout services for business owners, facility managers, builders and project managers. Our office staff send you quotes, invoices, and adjustments for variations on time.


FAQ’S

Q: What is the proper way to bond Corrugated Stainless Steel Tubing (CSST)?

A: Please refer to manufacturer’s installation instructions and review the following documents:

Direct Bonding of Standard (Yellow) CSST

2009 National Fuel Gas Code Excerpt

NFPA 70, National Electrical Code, 2014

Q: When is a permit/inspection required?

A: Electrical permits/inspections are required for all new installations and alterations unless ALL of the following conditions are met:

  • The Installation is performed by a licensed Electrical Contractor, Residential Electrical Contractor or their employees.
  • The installation does not in any way involve work within a new or existing switchboard or panelboard.
  • The installation does not exceed 30 amps.
  • The installation does not exceed 277 volts, single phase.

Q: I am a homeowner. Will I have to be licensed to wire my own house?

A: No, a license is not required for an owner of property performing work on the owner’s principal residence that qualifies for the homestead tax exemption, if such residence is an existing dwelling rather than new construction, and is not larger than a single-family dwelling. A new house will require the electrical work to be performed by a licensed Electrical Contractor or Residential Electrical Contractor. Inspections are required for all new electrical installations regardless of whether a license is required.

Q: What electrical code is adopted by the state?

A: Per Iowa Administrative Code 661-504.1, the provisions of the National Electric Code, 2017 Edition, published by the National Fire Protection Association are adopted as the requirements for electrical installations performed by licensed electricians.

Q: Do cities have to adopt the State Electrical Code?

A: Yes, the code that the Board adopts will apply to all electrical installations across the state. The codes that cities enforce cannot be less restrictive than the State Electrical Code


Reliable Electricians

While you can change a light bulb or run an extension cord, unless you’re an electrician by trade, any electrical job which requires wiring, repair, installation or replacement will need a professional. To give you the confidence to hire the right electrician, we’ve put together a guide that walks you through everything you need to know, step by step.

How much do electrical services & repairs cost?

The following are guide prices only, and include materials, and standard travel time.

Install or replace a power socket: $150 to $250

Install power point for washing machine/heater: $150 to $250

Electrical inspections: $250 to $400

Hot water cylinder repair: From $200+

Heat Pump or Air Conditioning Installation: From $400

Heat Pump or Air Conditioning Repairs: $150 to $300+

Wiring upgrades: Custom quote required

How does an electrician charge me?

A bill from an electrician is usually made up of a number of factors:

Labour charge – this is a set rate, exclusive, often between $90 and $120 per hour. There will often be a minimum first-hour charge.

Parts and materials – if the electrician has the parts in their van, or if they need to pick up something from an electrical store, you will be charged for what’s needed. There may be a markup as well.

Travel cost (this can be factored into the labour charge) – if the electrician charges travel costs, this is usually charged from the time the electrician leaves for your home, to when they arrive back at their base after the job. This will also include the time it takes to visit an electrical store to get any parts.

GST – the total of 1, 2 and 3 will be added, and (15%) added.

How can I get the best price for electrical work?

Shop around – it’s unlikely your electrical needs will be urgent, so don’t rush to confirm an electrician right away. Instead, approach an electrical job like you would when buying a phone or car – be calm and patient. Have a ring around and explain your electrical needs, and ask for an estimate of the job, as well as the hourly cost, travel cost and parts markup percentage.

Know that prices and quotes will usually exclude – be sure to check – our calculator shows the total price you’ll pay if you’re quoted ‘exclusive’.

Find a local electrician – electricians will often charge travel time, so the closer to your home is to the electrician and an electrical store (if needed), the cheaper the labour cost. For this reason, you will also pay more if you are in an out-of-town property.

Be available during standard business hours – you might have to be late for work or work from home for a half day, but most out-of-hours visits (i.e. 6pm to 7am, and all hours on weekends) will be more expensive than standard hours. If in doubt, check with the electrician before. If the job can wait, don’t pay a weekend or late night surcharge if it can be sorted the next day.​


Guide to Electrical Maintenance

The Guide to Electrical Maintenance provides guidance on carrying out maintenance activities and using good practice techniques. It examines the operational risks, mitigations and processes that may be used in carrying out electrical maintenance, and also provides insights and philosophies to ensure that electrical maintenance activities are not only safe, but are satisfactorily planned and properly carried out.

The Guide also draws together key guidance from other IET inspection safety and maintenance titles to provide a practical overview for duty holders responsible for maintaining electrical systems, electrical contractors and building service engineers.

Good maintenance regimes do not happen by accident: they need careful planning, proactive management and comprehensive reporting. The tone for good maintenance is also established beforehand by considerate design, intelligent construction and satisfactory commissioning.

A good maintenance regime also has its part to play in a more sustainable world where correctly maintained electrical systems keep operating at their maximum energy efficiency and are disposed of correctly at the end of their lifecycle.

This Guide is aimed at electrical contractors, engineering technicians, maintenance engineers and managers, design engineers, building service engineers and duty holders responsible for electrical maintenance.

Why LED Electrical Lighting Are Popular Now

LED Lighting

The operating life of a light emitting diode (LED) is unaffected by turning it on and off. While lifetime is reduced for fluorescent lamps the more often they are switched on and off, there is no negative effect on LED lifetime. This characteristic gives LEDs several distinct advantages when it comes to operations. For example, LEDs have an advantage when used in conjunction with occupancy sensors or daylight sensors that rely on on-off operation. Also, in contrast to traditional technologies, LEDs turn on at full brightness almost instantly, with no delay. LEDs are also largely unaffected by vibration because they do not have filaments or glass enclosures.


Reasons Why My LED Light Bulbs Aren’t Lasting

LED light bulbs typically boast an impressively long lifetime. It’s one of the many features that makes them worth the extra quid, but what if you find that your LEDs are burning out before their time? You’re trying to make the transition to energy efficient lighting and you’ve followed the guides, but the bulbs just aren’t lasting as long as they’re supposed to. It’s a frustrating experience and it can be hard to determine where the situation is going wrong, but we can help you avoid it by shining a light on what could be causing these failures:

Dubious dimming components

LED light bulbs are dimmable, with two caveats:

  • They have to say they are dimmable on the package. This indicates that they were specifically built to be dimming-capable.
  • They have to be connected to an LED-compatible dimmer switch.

Standard LED light bulbs aren’t equipped with the components for dimming, and old dimmers just aren’t built for the low wattage of an energy-efficient LED bulb. While an old dimmer switch may work for a while and a standard LED light bulb may still technically dim, at some point you will run into problems with high-pitched buzzing or whining noises, flickering, and premature light bulb burnout.

SOLUTION:

Select light bulbs that specifically state they are dimmable and upgrade to an LED-compatible dimmer switch:

High voltage

If you find yourself burning through multiple light bulbs throughout your home in the span of months, or you notice the bulbs burning more brightly than they should, the mains to your house might be too high. In the U.K., the electricity entering your home should fluctuate around 230V at 50 Hz. If it is consistently much higher than that, the overpowered voltage will cause any type of light bulb to burn out faster than it should.

SOLUTION:

If you suspect this is the issue, have an electrician test the voltage in your home or contact your electrical provider to have it corrected.

Overheating

Unlike incandescent light bulbs, LEDs don’t produce light using heat. This is part of what makes them so energy efficient. The downside is that their components can be sensitive to overheating, which can cause them to burn out prematurely. LEDs can overheat if they:

Are used in enclosed fixtures but aren’t designed for them (packages usually specify what types of fixture a certain bulb is ideal for).

Are too large for the fixture—just because the base fits, doesn’t mean the bulb should be there.

SOLUTION:

Select LED light bulbs that are the right size for your fixture so it gets proper ventilation, and only use bulbs rated for enclosed or semi-enclosed fixtures in places like recessed lighting fittings.


LED’s Sound Good, But They are Too Expensive”

The many pros of LED lighting are often overshadowed by a single myth; LEDs are expensive! Simply put, an LED bulb can cost a few dollars. Earlier models were very expensive. LEDs have been around for many years now and they are readily available at all price points. It can be hard to justify retrofitting to LEDs when you still believe this myth that LEDs are too expensive. With improvements in manufacturing, increased market saturation and rapid-development of LED technology, the benefits of an LED upgrade supersede all alternatives.

Details

The Light Emitting Diode (LED) itself is the most efficient lighting technology yet.

LEDs effectively emit light in specific directions instead of scattering it to all spaces, reducing light pollution.

Incandescent lamps waste up to 90% of their energy as heat. LEDs waste very little energy.

In certain conditions a single bulb can last over 20 years. This cuts labor hours of maintenance, costs of replacement bulbs, and of course the savings on the utility bill over that time will make up for the initial cost.

Solution

This LED lighting myth is easily avoided with smart planning. Many utility companies offer rebates as an incentive to upgrade to LEDs. There are other incentives offered for commercial properties who are upgrading to LED fixtures as well. Rebates for well designed projects that save a lot of energy can add up quickly and take thousands of dollars off the cost of a light retrofit project.  Ask your lighting professional if project or equipment rebates for lighting are available in your area.


How to install Solderless connectors for LED strip lighting:

  • Cut along the mark line, and tear a little bit of 3M backing tape from the mark. 
If 3M tape is not peeled off a little, it will be harder to insert the strip into the connector.
  • Lightly pull the black plastic lock out from the solderless Pulling too hard may damage the LED solderless connector.
  • Insert strip into the solderless connector. There are two sides to the connecting tray – make sure the wider of the white sides faces up. This is the top.
  • Make sure the soldering pads fully touch the conjunction metal.
  • Push the plastic lock back towards the middle into the lock position. Be gentle and make sure the mounting tray is securely closed or the lights will not light up. Double check the markings of (+) and (-) to make sure which color wire corresponds to each.
  • For long term use, try and use liquid tape or a bonding material to make sure the connector does not become loose.


Do LED Lights Create Fire Risks?

LED lights do not emit light from a vacuum as most other bulb types do. The illumination is provided by something solid known as a semiconductor. If you are considering changing to LED lights, whether you are looking at a retrofit of full fit solution, you will see whole lists of benefits for changing from incandescent or fluorescent bulbs. These tend to focus on the cost savings and the environmental friendliness of LED, but it is also important to note that they have a much lower chance of causing a fire.

Overheating is one of the reasons a bulb could start a fire, but that is highly unlikely to happen with LED lights. They may feel hot to touch, but they produce light at a significantly lower temperature than other bulbs. Traditional bulbs use a filament, which loses a lot of energy through heat emissions, and incandescent bulbs generate heat as infrared radiation.

The fact traditional lights radiate so much heat has meant they are sometimes used as heat sources themselves, poultry incubation and heaters for reptiles being just a couple of examples.

As LED lights do not affect the ambient temperature they are ideal for small, confined or temperature-controlled areas.

Less Heat, More Light

One of the reasons LED lights have such a long-life span is because the technology in place uses a heat sink, located at the bulbs base. This draws most of the heat to one area and keeps the electronics relatively cool. An LED light in its hottest part is approximately half the temperature of a halogen or incandescent bulb but emits the same amount of light. Traditional lights lose between 60 per cent and 95 per cent of their power to heat, so are far more likely to be a fire risk than LED lights. They hold their heat internally and use the bulk of their energy to produce light.

Could Retrofit LED Lights Be Your Solution?

If you are concerned about the state of your lights, or if they are near fabrics or materials that are easily combustible, you may be considering changing your lighting system to LED lights, but you could be worried about the installation costs.

Everything You Need To Know About Circuit Breakers

What’s Inside the Circuit Breaker Panel

The service entrance wires connect to two large terminals, called lugs, near the top of the panel. These lugs are always energized unless the utility company shuts off the power. The lugs—and all the wiring connecting to the panel box—are covered by a flat metal panel called the dead front cover. This is what you see when you open the door of your breaker panel. The dead front cover has cutouts that allow access to all the breakers, and that’s as far as homeowners need to go. Do not remove the dead front cover unless you know what you’re doing.


Basic

The simplest circuit protection device is the fuse. A fuse is just a thin wire, enclosed in a casing, that plugs into the circuit. When a circuit is closed, all charge flows through the fuse wire — the fuse experiences the same current as any other point along the circuit. The fuse is designed to disintegrate when it heats up above a certain level — if the current climbs too high, it burns up the wire. Destroying the fuse opens the circuit before the excess current can damage the building wiring.

The problem with fuses is they only work once. Every time you blow a fuse, you have to replace it with a new one. A circuit breaker does the same thing as a fuse — it opens a circuit as soon as current climbs to unsafe levels — but you can use it over and over again.


Main Safety Features of a Circuit Breaker Panel

These are the main electrical supplies and materials of the circuit breaker panel:

  • The Main Circuit Breaker – This is the switch that goes on and off to control the flow of current. So if there is an overload due to a short circuit or because too many appliances are running simultaneously, the corresponding circuit breaker automatically trips to shut off the flow of current. Standard breakers can be further subdivided into the following two categories:
  • Single-Pole Breaker – These single switches are typically between 15-20 amps, are commonly found in most circuit breakers and can handle up to 120 volts.
  • Double-Pole Breaker – These pole breakers are available in different amperages and can handle 240 volts. Double-pole breakers are designed for large home appliances like air conditioners, water heaters, washing machines and stoves.
  • Arc Fault Circuit Interrupters – These are special purpose circuit breakers designed for additional safety against electric fires and electrocution.
  • Sub-Panels – sub-panels are small breaker boxes designed to handle more circuits when you don’t have the space to accommodate new circuits.
  • Bus Bars – The two rows in the main circuit breaker panel connect to hot bus bars. This is where the current flows from the main breaker to the branching circuits and reaches the outlet.


Solve an AFCI tripping problem

If you have a problem with an AFCI (arc fault circuit interrupter) shutting off in you main electrical panel, you’re not alone. Arc fault circuit interrupters are prone to “nuisance tripping,” which is probably what you’re experiencing. AFCIs are designed to sense an arc, which is an electrical “leak” caused when a hot wire touches a neutral or ground but doesn’t trigger the circuit breaker. Although current-sensing circuitry enables AFCIs to detect arcing conditions, unintended trickles of current may also cause the breaker to shut off (AFCIs are very sensitive!).

To solve the nuisance tripping problem and provide arc fault protection, start with things you can do yourself. Unplug or turn off surge protectors plugged into bedroom outlets, fluorescent lights with electronic ballasts, and lighting controls with LED displays that are on the AFCI circuit. They sometimes allow current “leakage” that can trip the AFCI and create a situation where a circuit breaker keeps tripping without a load. Damage or deterioration to wires or cords (which can happen when furniture is pushed against plugs in an outlet) also causes arcing faults and will trip the circuit. If you identify one of these sources, you’ll have to replace the electrical item.


Are All Circuit Breakers the Same?

There are different types of circuit breakers. The most common ones include:

  • Simple domestic circuit breakers: Prevent damage to home wiring by cutting power to overloaded circuits.
  • Ground fault circuit breakers (GFI): Prevent shocks caused by ground faults, which may occur when electricity contacts water.
  • Commercial circuit breakers: Used with extremely high voltage circuits, these have circuitry to adhere to per pre-defined safety criteria.

Do Electrical Panel Upgrades For Your Electricity safety

Thinking of upgrading your electrical panel or service? Some things you should know

Just like many other electrical contractors (ECs), I get numerous estimate inquiry calls for electrical panel or service “upgrades”. Service upgrades are the mainstay for many ECs businesses–and they are very good at doing them quickly, and with excellent quality

However, don’t be fooled. Just because an EC has the experience doesn’t mean that are actually good, reputable, or licensed electrician. As with any other contractor you must do your due diligence. Before hiring anyone, you should know how to spot a shady or unlicensed electrician. And of course, you should also know how to hire a good electrician

One of the big topics of discussion revolves around future home improvement plans. It’s important for the EC to ask about the homeowner’s future plans. What other reno work do they want to do? Does this support their decision to get a service upgrade?

You are planning to get a hot tub within the next five years to accompany your backyard landscaping remodel. Your Electrician must ensure that your panel is large enough to fit more breakers, or your service is big enough to handle the additional load.

The code details the demand requirements for residential (single-family), commercial residential (multi-family), commercial and other applications. Section 8 Circuit Loading and Demand Factors of the CEC is most helpful for homeowners. It primarily deals with what size your electrical service is required to be based on


tips for upgrading home’s electrical system

Wire size is counterintuitive

The larger the gauge number, the smaller the wire. Eighteen-gauge wire is smaller than 12-gauge wire. The larger the wire, the greater the load it can handle safely without getting hot or causing a fire

Generally a 14-2 Romex cable will serve most outlets

This means two insulated 14-gauge wires and one bare wire encased in a rubber sheath. The black wire is the “hot” wire; the white wire is the neutral wire; and the bare wire is the ground wire. It’s suitable for loads up to 15 amps.

Generally, outlets serving the kitchen and dining room should be 20-amp circuits wired with 12-2 Romex

This is because these circuits will likely take appliances that draw greater amperage

Outlets and switches within a certain proximity to a sink or other water source must be protected by a ground fault circuit interrupter (GFCI)

A GFCI breaks the circuit even when a minute amount of water is present. This safety device prevents electric shock and in extreme cases prevents death. Plugs installed in basements, garages, outdoors and bathrooms also require GFCI protection.

Electric dryers require a 30-amp outlet protected by a 30-amp circuit breaker, while an electric oven mandates a 50-amp and 8-gauge wire protected by a 50-amp breaker


How to Upgrade an Electric Meter and Panel to 200-Amp Service

Working inside an electrical panel is dangerous and is best left to a professional electrician.

Ensure that power is off to the entire building, which may involve more than just shutting off the main breaker

Have utility company to disconnect electrical cables from the house. Remove the glass meter from the meter socket

Unscrew meter socket from side of house, then use cable cutters to sever the cable connected to the socket. Enlarge existing cable hole in wall using a cordless drill and 3-inch-diameter hole saw

Bore through the rim joist using an extension shaft and 2-inch-diameter hole saw. Attach a length of 200-amp SE electrical cable to the new meter socket

Feed the SE cable through the hole in the wall and then screw the meter socket to the exterior of the house. Use a torpedo level to ensure the socket is level. Install the new PVC weather head and conduit to the exterior wall, directly above the meter socket. Secure the conduit to the meter socket using PVC cement. Fasten the conduit to the house with U-shaped plastic clips.


Signs You Might Need an Electrical Panel Upgrade

The electrical panel is an essential component of your home’s electrical system. Within the panel are circuits, which carry electricity throughout your home to outlets, lights, and appliances. The number and size of the circuits determine your home’s electrical capacity.

If you’re experiencing electrical problems like the ones you’ll learn about in this article, it might be time for an upgrade. The first step in the upgrade process is determining your home’s electrical load. Do you have enough amps to meet your electrical needs? If you think about electricity like water flowing through your home, an amp is the rate at which electricity flows. A few decades ago, 60 amps was enough to suit the needs of the average American household. Today, 100 amps is standard in the average home, with larger homes that use a lot of electricity needing 150 to 200 amps.

Signs of Electrical Problems in Your Home

Be on the lookout for any of the following signs of a possible problem. If your home is experiencing any of these issues, call a professional to inspect your electrical system, because it might be time for an electrical panel upgrade.

Electrical shocks. Mild shocks and tingling can mean that the wiring is defective or that it was improperly installed. If this is the case, there’s a risk of ‘electrical leakage’ when you touch the switch or outlet.

Burning odors or sparks. The occasional spark is not unusual, but large or frequent sparks can be signs of deteriorated wiring or a faulty circuit. Also pay attention to warm or discolored outlets. Whether the cause is faulty wiring or an overloaded circuit, you’ll want to talk to an electrician about these issues.


Should I Upgrade My Electrical Panel?

Should I upgrade my electrical panel? The electrical panel remains one of the most essential components of the house. The electrical panel brings comfort and convenience to the residents in the form of electricity. This device is responsible for providing power throughout the entire house. After some time, the electrical panel becomes old or outdated. At this point, you are faced with the question: should I upgrade my electrical panel? There are various kinds of electrical panel upgrade. You can upgrade electrical panel to 200 amps. You can also replace fuse box with breaker panel. Continue reading to discover more about electrical panel replacement and upgrade.

Your Home is Old

Old residential apartments offer cozy and retro atmosphere. This is not present in a modern home. However, these older apartments with obsolete electrical panels may not be able to support your modern electrical needs. If your old home has a 60-amp electrical panel, you may need to upgrade electrical panel to 200 amps. This way, you can use modern electrical equipment you need.

Introduce New Appliances

Furthermore, outdated electrical panels may not be able to handle the workload required to power an entire home of new major appliances. This includes your refrigerator, air conditioning unit, hot tub, dryers, water heaters, and washing machine. The majority of these electrical appliances require a 240V circuit. If you want to introduce new appliances, electrical panel replacement or upgrade will be a good idea

Replace Fuse Box with Breaker Panel

What’s more, fuses have become outdated. Circuit breakers are now more efficient. They do not trip off due to overload. An electrical panel replacement offers you an excellent opportunity to replace fuse box with breaker panel. In case you are wondering why should I upgrade my electrical panel? Then, you may need to do so to replace your fuse-based electrical system with circuit breaker.

Prevent Potential Electrical Fires

Over time, over-crowded connections can turn to loose connections. Thus, causing a wiring fault which can potentially lead to electrical fires. Electrical panel upgrade can help prevent possible electrical fires

Use Outdoor Electrical Lighting To Make Your Garden More Beautiful At Night

Outdoor Solar Lighting – The Solar Benefits

What is solar lighting?

The principle of how solar lighting works is actually quite simple. The physical explanation behind why it is possible to collect the solar energy and transform it into lighting lies in the photovoltaic effect which is being used in a solar panel or photovoltaic cell that is able to collect the solar energy (i.e. the energy that is produced by the Sun) throughout the day-time.

After being collected, the energy is usually stored in a rechargeable gel cell battery and used later in the evening when there is no sunlight to produce lighting. The light is being turned on by an intelligent controller which is switching on the LED light using the energy that has been stored.


Advantages of solar lighting

Cost effective

Several benefits of solar lighting make it one of the most popular outdoor lighting systems used in homes today. The major benefits of solar lighting are its cost effectiveness and unique design. It is very suitable for saving energy consumption because it used solar energy to power up its light bulbs. It does not use any electricity . Thus it would greatly help you in reducing your electric bill. The mechanism of this solar lighting system is powered up by rechargeable batteries. Once the sun’s rays hit its solar panels, the batteries are automatically recharged. Since it mainly depends on solar energy, there is no need to install any outdoor outlets or power cords. This would greatly reduce the cost of adding extra lights.


Affordable

Trying to reduce that pricy power bill? Outdoor solar lights are extremely cost-efficient since they are operated by rechargeable batteries via the sun and do not require any digging, trenching or wiring whatsoever. In addition, many of Gama Sonic’s new products are crafted using our new patented LED light bulb technology. Using LED bulbs is beneficial for consumers looking to cut back spending since they generally last longer than traditional bulbs and use less energy. Learn more from Energy.Gov about the different types of light bulbs and how they can affect both your energy-output and spending.

Environmentally Friendly

Solar lights are an easy way for you to decrease their carbon footprint. Aside from using converted energy from the sun, solar-powered lights are also eco-friendly due to the materials they are made with. For instance, the new Gama Sonic LED light bulb boasts a 10-year lifespan, meaning you will not have to constantly replace and throw away old and dead light bulbs. In comparison to incandescent light bulbs, LED light bulbs are designed to consume less energy and last longer.


Green Alternative

Solar lighting is a green alternative to traditional lighting using no power at all from the grid. Since the systems are completely powered by solar energy, one of the world’s leading renewable energy technologies. The solar feeds batteries during the day and most batteries are completely recyclable, especially the ones used in a solar application. At night, the long lasting LED fixtures operate off the stored power to illuminate the area. The next day, this process repeats with no outside energy source.

Low Cost Installation

Installation can be very low cost, sometimes much lower than trenching grid power to the location the lights are required. Poles still get set just like with standard grid powered light, well maybe with larger footers; however, there is no underground conduit running from the main power source from pole to pole. All wiring is located at the top of the pole or on a nearby pole for some installations, and is also low voltage which makes it much safer for installation and maintenance. Finally, barriers such as root systems, underground utilities, or other obstacles typically causing issues with standard electric trenching are no longer an issue.


Little maintenance.

Solar power products have few moveable parts which means that fewer parts exist to break. They last for a long time and require little attention once installed.

Renewable resource. Solar power is a renewable resource. Other energy resources, such as coal and oil, have finite supplies. The power of the sun, on the other hand, will keep on shining, potentially beyond human existence.

  • With solar lighting there is no risk of electrocution and the lights are cool to the touch, making them safe for children and pets.
  • Solar lights continue working even if there has been a power outage. Because the energy isn’t coming off of an electrical grid, power outages make no difference.

Tips To Make Commercial Electrical Remodel

How to Remodel a Kitchen On a Budget

Wondering how much a kitchen remodel costs? Get your fainting couch ready because, the average kitchen remodel costs a staggering $20,301 — roughly the same price as a brand-new Honda Civic. And a major kitchen remodel can cost over twice as much, with an average price tag of $50,000.

Putting down that much money on a new kitchen is worth it for some. But others aren’t interested in splurging on high-end updates. Luckily, putting your kitchen remodel on a budget doesn’t mean you have to sacrifice style.


Refresh Rather Than Replace Cabinets to Save Money

New kitchen cabinets are invariably expensive and contrary to the entire notion of a budget kitchen remodel. In general, all tear-out-and-replace projects are much more expensive than projects that keep a majority of the materials, and cabinetry is a prime example.  It is also more eco-friendly to avoid landfilling tons of flooring, glass, laminates, plastics, and other materials that take centuries to degrade. There are several good options that won’t require new kitchen cabinetry:

  • Painting your kitchen cabinets is the classic method of refreshing the outside shell of your cabinets.
  • More expensive than painting, kitchen cabinet refacing adds a new wood or thermofoil veneer to the outside of the cabinets and entirely replaces doors and drawer fronts.
  • If you are replacing your cabinets, think outside the box. Cabinets are usually less expensive when they are partially constructed from MDF.
  • If you don’t mind putting together your cabinets, you can look for RTA (ready to assemble) kitchen cabinets.

One way to limit the use of expensive wall cabinets is to install some open shelving. Result: an airy feel, almost like that of a commercial kitchen.


Use DIY Kits to Update the Lighting

One of the easiest and most affordable ways to update your kitchen is to use a recessed lighting conversion kit — no electrician required.

The kits only cost $15-$20 each and are a cinch to install, even for DIY newbies. The parts screw right into the recessed light, a brace holds the new light fixture in place, and a decorative cover hides the recessed light.

In about 15 minutes, you’ve got dramatic new kitchen lighting.


Flooring

New flooring for a mid-range kitchen typically costs $1,800 to $2,800. Here, again, the price varies depending on the material you use. Sheet vinyl can cost as little as $1,000, while hardwood – a popular choice for modern kitchens – costs around $4,000.

If your budget won’t stretch this far, here are a few cheaper flooring options to consider:

  • Just Clean Sometimes, a good cleaning is all it takes to get old tile floors looking like new. If yours is so filthy that mopping it no longer has an impact, you can have it professionally cleaned for around $450.
  • Look Underneath. If your kitchen has hideous old vinyl flooring, it could be worth peeling it up and having a look at what’s underneath. Sometimes, buried under the layers of cruddy vinyl, you can find perfectly good hardwood floors that only need to be refinished. That’s a job you can have done for around $600.
  • Use Peel-and-Stick Peel-and-stick vinyl tiles are easier to work with than sheet vinyl, so installing them is a fairly easy DIY job. If your floors are reasonably undamaged, you can apply the new tiles directly over the old flooring. You can buy peel-and-stick tiles at home centers for around $1 a square foot.

Paint the Floor. Believe it or not, it is possible to paint over old vinyl flooring. Clean the floor well, and scuff it lightly with sandpaper. Then roll on a coat of primer and paint it with tough “porch and floor” paint. Optionally, you can add a coat or two of water-based polyurethane to protect it. You can choose your own color and add patterns like stripes, checks, or stenciled designs. You can transform an entire floor this way for about $100.


Outdoor Kitchen Designs for Ideas and Inspiration

Outdoor kitchens typically include a prep and cooking area, some storage, and either a bar or dining table seating. These elements are a good start for the budget-conscious because they don’t require utilities like gas, electric or plumbing.

Outdoor kitchens can get expensive, and there are a few elements that may push your budget over the edge. Adding anything that requires a contractor or professional, like electrical or plumbing, will add up quickly. Avoid this by positioning your outdoor kitchen near an entrance or in close proximity to a water hose for easy access to kitchenware and cleanup. Opt for a propane tank or charcoal rather than installing gas lines to your grill or cooktop. And look for items that are portable so you can take them with you if you decide to move

Electrical Home Inspections Are Conducted Regularly For The Safety Of Your Home

ELECTRICAL HOME INSPECTION: WHAT YOU SHOULD KNOW

Whether you’re buying a home, or just moving in to your new home, here is some advice that can help you. If you’re in the buying process the things you will be looking for are safety and repair aspects. Most electrical contractors can offer you an inspection to check for both of these. If you are thinking to yourself right now that you have or are going to hire a Home inspector, think again. A home inspector does a generalized inspection. Most of them will know a little about a lot of different areas, but be an expert in none with a few exceptions. It is a certainty in most areas to say you will be forced to hire one to get a mortgage, and that’s a good thing. If you hire an experienced licensed electrician, your electrical inspection will be more thorough and you can get an estimate to what repairs will cost at the same time.

When buying a home you’ll want to know what if any defects there are, or safety hazards. Items that rate high on the list are things like aluminum wiring, GFCI receptacles, grounding and water leaking into service parts. The two of these that are most critical, dangerous and expensive are the aluminum wiring and water leaks into the main service. If you are just moving into a home you purchased, there are some things you can do to be sure your electrical system is safe. I highly recommend that all the devices be changed to new ones. This would be all the switches and receptacles. There is a reason for this. Most electrical problems occur when termination points become loose or corroded.

By having the devices professionally replaced, you can nip any of these problems before they occur. The other item to consider changing is light fixtures. This can be a bit expensive so if it isn’t in your budget try to at least change the very old ones. The reason for changing these is older fixture wires tend to get very brittle. If the bulbs used in them over the years were of an improper wattage, this can exaggerate the situation, a very common occurrence.

The peace of mind you will get, knowing a professional electrician in the electrical field inspected your home, is well worth the money spent.


When Do You Need to Get an Electrical Inspection

An electrical inspection will ensure your home or business’s wiring and other electrical components are in good working order and do not pose a hazard to yourself or your family.

A comprehensive electrical inspection may involve the following:

  • Determining any electrical hazards
  • Checking for uncovered permanent wiring
  • Checking for any exposed wires
  • Checking for outdated wiring
  • Testing safety switches
  • Examining the power box
  • Checking safety switches
  • Testing power points and lighting
  • Evaluating the level of electrical service
  • Assessing whether the home includes any DIY wiring
  • Noting the location of smoke alarms and testing them
  • Scanning for any electrical items that don’t comply with current government regulations

Knowing exactly when you need an electrical inspection done on your home can be tricky, which is why we’ve compiled a list of occasions where you may need an electrician to come and take a look at the electrical system in your home.

  • BEFORE YOU COMMIT TO BUYING A HOUSE
  • IF YOUR HOUSE IS OLD OR YOU HAVE ANY CONCERNS
  • IF THE HOUSE IS OVER 25 YEARS OLD.
  • IF YOU HAVE OLD WIRING.
  • IF ANY DIY WORK HAS BEEN CARRIED OUT.
  • AFTER A MAJOR STORM

Preparation before a storm

There are several precautions you can take to ensure that your house is prepared for a major storm:

  • Make sure safety switches are installed on all circuits in your switchboard and test them to ensure they are working properly.
  • Switch off and unplug all critical appliances that you don’t need to use.
  • Consider installing a surge protector to reduce electricity spike damage and help with general power surges, this will protect your appliances like those expensive televisions, A/C units and computers.
  • Steer clear of all electrical cables, lights, appliances, fixed wire phones or any conductive materials during a storm.

After a storm

Following a storm, you should take the following actions if your home has been affected by storm damage:

  • If your property has been flooded over power outlets, electrical wiring or any other electrical installations such as switchboards, organise a licensed electrician to check the premises as soon as the water subsides. Do not attempt to touch or unplug any appliances in the meantime.
  • If any electrical appliances were affected by water during the storm, have them checked by a licensed electrician before use.
  • If your electricity was disconnected during the flood, you will require a certificate of test from a licensed electrician before the Distribution Entity will reconnect the power.


9 Tips for Passing an Electrical Inspection

If you are considering attempting your own electrical work on your next project, I implore you to apply for electrical permits from your local government.

Applying to do my own work was a simple process.  In this case, all I did was fill out a couple of simple forms where I stated my name, address, the scope of the work being performed (adding 4 recessed lights) and the estimated cost of the work related to the permit.  After about two weeks, the township called me and let me know my permit was approved and ready for pickup.  I paid a $61 fee to the township and got started on the rough-in work.  Once I complete the rough-in work, I schedule the inspector and he pays me a visit.

The most anxiety inducing part of this process is the rough-in inspection, but if you follow these general guidelines, you’ll be much more likely to pass the first time.

  1. Ask the Inspector First. When you schedule the inspector, try to actually have a conversation with him or her about what they expect to see and what pitfalls you can avoid.  All inspectors should be looking for the same checks, but some have additional requirements or pet-peeves that can fail you.  Checking with them first is a great way to establish a name to a face and get a sense of their general requirements.
  2. Don’t Add Any Devices. During the rough-in inspection, there can’t be any devices on the circuits you are adding. No outlets, no lights, no switches, nada, nunca.  If you are adding an outlet to an existing circuit, then the NEW outlet should also not be installed either.  The rest of the outlets on that circuit that were originally there are probably fine, but if you disturbed the wiring in any outlet, it shouldn’t have a device for the inspection.
  3. Tie Your Grounds Together. In each outlet or electrical box location, the ground wires should be tied together.  This is something my inspector noted today.  Don’t tie anything else together though.  The hot and neutral leads should remain separate.
  4. Fire Block. Any holes or penetrations from one floor to the next or from one wiring passage to the next needs to be blocked so as to prevent a fire using the hole as a breathing hole or chimney.  Typically, you can use fire block expanding foam (which is bright orange in color) or regular fiberglass insulation to fill or plug these kind of holes.
  5. Plug Holes in Boxes. This one was new to me and I’ll have to fix it.  The electrical box I used have these bendable tabs where the cable enters.  Well one of these tabs snapped off.  The inspector told me I need to plug it.  I’ll probably use insulation and jam it in the hole here.
  6. Use Correct Breaker. Another correction I’ll have to make is the circuit breaker I installed.  The breaker in this application needs to be an 15 amp Arc Fault Circuit Interrupter (AFCI) and I had installed a regular 15 amp breaker.  The AFCI’s prevent arcs and are required on all circuits that feed living spaces (I think).  You can buy AFCI’s in any hardware store and they are several times more expensive than regular breakers.
  7. Don’t Power the Circuit. Although the wires for the new circuit can be tied into the new breaker, the breaker needs to remain off or unpowered.  It shouldn’t be powered up until all the devices are installed.
  8. Cover the Wires with Wire Nuts. All the wire ends need to have wire nuts on them even if they don’t have any exposed conductor.  Same goes for the ground wires.
  9. Secure Cables with Staples. Cable runs need to be secured to framing every so many feet with cable staples.

That’s pretty much all I have for the rough-in inspection.  If you have any others, please leave them in the comments.  If you’ve never done your own electrical work, then I suggest you work with someone more experienced before you attempt it yourself.  Be safe and good luck.


How often should you have an electrical check?

How often you should get an electrical check will depend on how old your house is and the number of appliances it supports. Older houses may have an outdated electrical system which can’t support certain appliances and increasing loads.

A periodic inspection involves conducting checks and associated testing to see if the electrical components of a house are working optimally. After the required inspection and testing, an Electrical Installation Condition Report will be issued. The report shows any observed defects, damages, unsafe conditions, and any non-compliance with current safety standards that could lead to danger.

It is often recommended to get an electrical check every 3-5years. You also need to update your electrical system, when necessary,to keep up with recent safety standards, even if you have a relatively new house.

To maintain adequate safety standards, periodic testing and inspection should be carried out as follows:

  • Every 5 years, at least, for businesses
  • Every 5 years, or during every change of occupancy, for tenanted properties
  • Every 10 years, at least, for private homes

You will know that your electrical system is inadequate when you start experiencing any of the following:

  • Fuses constantly blowing
  • Outlets and switches no longer working properly
  • Tripping circuit breakers
  • Your electrical outlets are two pronged instead of three pronged
  • Lights flicker when an air conditioner, heater, or some other appliance is turned on

Regular checks should be carried out around the house to monitor the condition of sockets, switches, cables, and other accessories.  Once anything unusual is noticed, such as circuit breakers tripping or fuses blowing, crackling or buzzing, or burn marks on sockets and plugs, a registered electrician should be contacted to conduct an electrical check immediately.Various factors can lead to the wear and tear of electrical installations, including how the property has been used and the materials that the installations are made of.

When an electrical check is done and it is discovered that a rewiring is needed, it is recommended to remove redundant wiring. To avoid any risks, all redundant wiring must be disconnected permanently from any electrical supply if it is not possible to have it removed. There are no set rules as to when a property should be rewired. Rewiring should not be done just because the wiring of a house is old. As long as it meets safety conditions and is in good shape.

For caravans and swimming pools, there should be more frequent periodic electrical inspection and testing as follows:

  • Every 1 year for swimming pools
  • Every 3 years for caravans


Failing a Home Inspection

The areas that cause the most trouble on a home inspection report are those that compromise the health and safety of people living in the home. Here are some examples of ways that a home could fail an inspection:

  1. Moisture in the Basement: Water intrusion is a possibility in most basements simply because they are below ground level. Water in the soil puts pressure on basement walls and since it follows the path of least resistance, will cause a wet basement over time. A damp basement can cause spalling in concrete, brick or stone and it can cause mold as well. Solutions range from redirecting gutters to installing a sump pump in the basement.
  2. HVAC Problems: HVAC systems are the source of many problems uncovered by home inspectors. For example, the home’s wiring may not be sufficient to handle the demands of the heating and cooling equipment, gas-fired furnaces may not have adequate exhaust systems in place. Other problems include cracked ductwork and flue pipes that have not been correctly installed.
  3. Roofing Problems: This is one of the more expensive problems to fix and is likely to be a deal breaker for potential buyers. As roofing materials age, they are more likely to break down causing leaks and water damage; furthermore, they tend to age more quickly if they are not correctly installed. For example, asphalt and wood shingles can cup or curl due to age.
  4. Moisture Problems in the Attic: Poor insulation, ventilation or vapour barriers can lead to moisture in the attic. Moisture in the attic can cause mold and mildew to grow. Solving the problem involves finding and fixing the source of the moisture.
  5. Electrical Issues: A home’s electrical service should meet current standards. Electrical problems inspectors often encounter include overfusing, which is the term used for a mismatch between the wire and the overcurrent protection. Overfused circuits can cause fires.
  6. Rotting Wood: Any wood used in the home’s construction can be affected by moisture and age. This includes your wooden decks and door frames. Inspectors will check wood surfaces in the home for rot.
  7. Security Issues: This is not about your security system; this part of an inspection involves checking out your more basic safety features. An inspector will look for proper window and door locks as well as smoke and carbon monoxide detectors.
  8. Problems with the Structure and/or Foundation: One of the basic facts of construction is the fact that a stable foundation is essential to the building’s structure. The inspector will look at the footing and foundation of the home. Signs of foundation issues include cracks in walls and doors that fail to latch or that jam.
  9. Plumbing Problems: It’s rare for an inspector not to not find at least one plumbing problem. These can include anything from dripping faucets to slow drains. Fortunately, these issues are usually easy and inexpensive to fix. It’s major ones you need to worry about.
  10. Defective Masonry: Chimney cracks are among the most common masonry problems. In most cases, these occur over time due to the weather. If the inspector discovers cracks that start at the chimney’s base and go upward, there could be a serious structural problem.

The good news about a failed home inspection is that almost any problem can be fixed. Mold can be remediated and a qualified electrician can remove and replace amateur wiring. The best option for a seller who has had problems uncovered by an inspection is have them fixed. The other option is to not fix the issues and to sell the home at a lower price. The problem with that second option is that the seller may inadvertently discount the home for more than the cost of repairing the issues. Also, homebuyers may be reluctant to invest in a property that will need immediate repairs.