Choosing The Right Stucco Repairs Company

Guide To Stucco Repair Done Right

Black mold, wood rot, decay, and water damage have all been found behind improperly installed Stucco. If your stucco wall hasn’t been installed the right way, it will likely fail. Most Sun City residents are very familiar with the class action lawsuit that settled on April 18, 2019 for just north of $43 million. Now that the lawsuit is over, many residents are focused on making the proper repairs to keep their homes safe, free of health hazards, and protected from further water damage.

Once news of the original stucco delamination made its way through Sun City, residents like Connie Sehlinger began to assess the likelihood of serious issues with her own home. Connie took quick action in order to avoid a more expensive, and potentially dangerous problem.

After receiving a settlement from the lawsuit, Connie thought “I’ve got this money. I’ve had this house checked twice, and I better have it checked again before I decide to take a vacation with this money.  I may have to use it for the side of the house. Which is exactly what happened.”

Spring Construction: The Lowcountry Stucco Experts

One of the area’s most accomplished stucco contractors, George Hutchinson, owner of Spring Construction has been working in the Lowcoutry for 15+ years.

Connie hired George and Spring Construction for several reasons, including his expertise, competence, ten-year transferrable warranty, referrals, and his polite and trustworthy demeanor. But, before George began working on Connie’s home, he thoroughly assessed Connie’s potential for water damage.
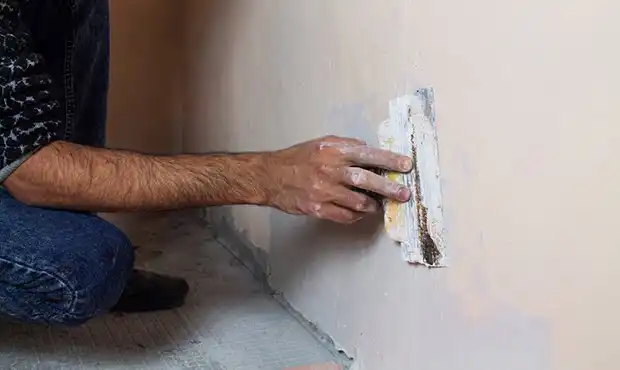
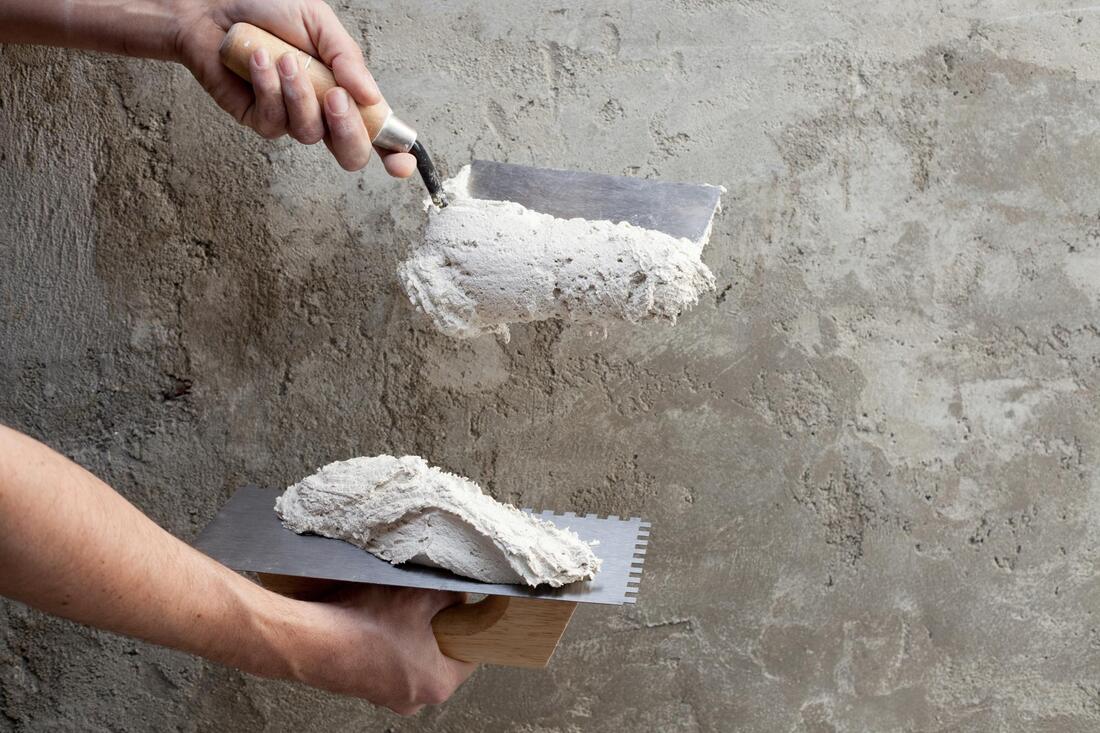
 

STUCCO REPAIR

PROTECT YOUR PROPERTY WITH STUCCO WALLS

Your stucco walls have been providing your home with a beautiful protective exterior surface for many years, but when the time has come that they need repair

Thankfully, one of the significant benefits to stucco as a building material is that it is extremely repairable

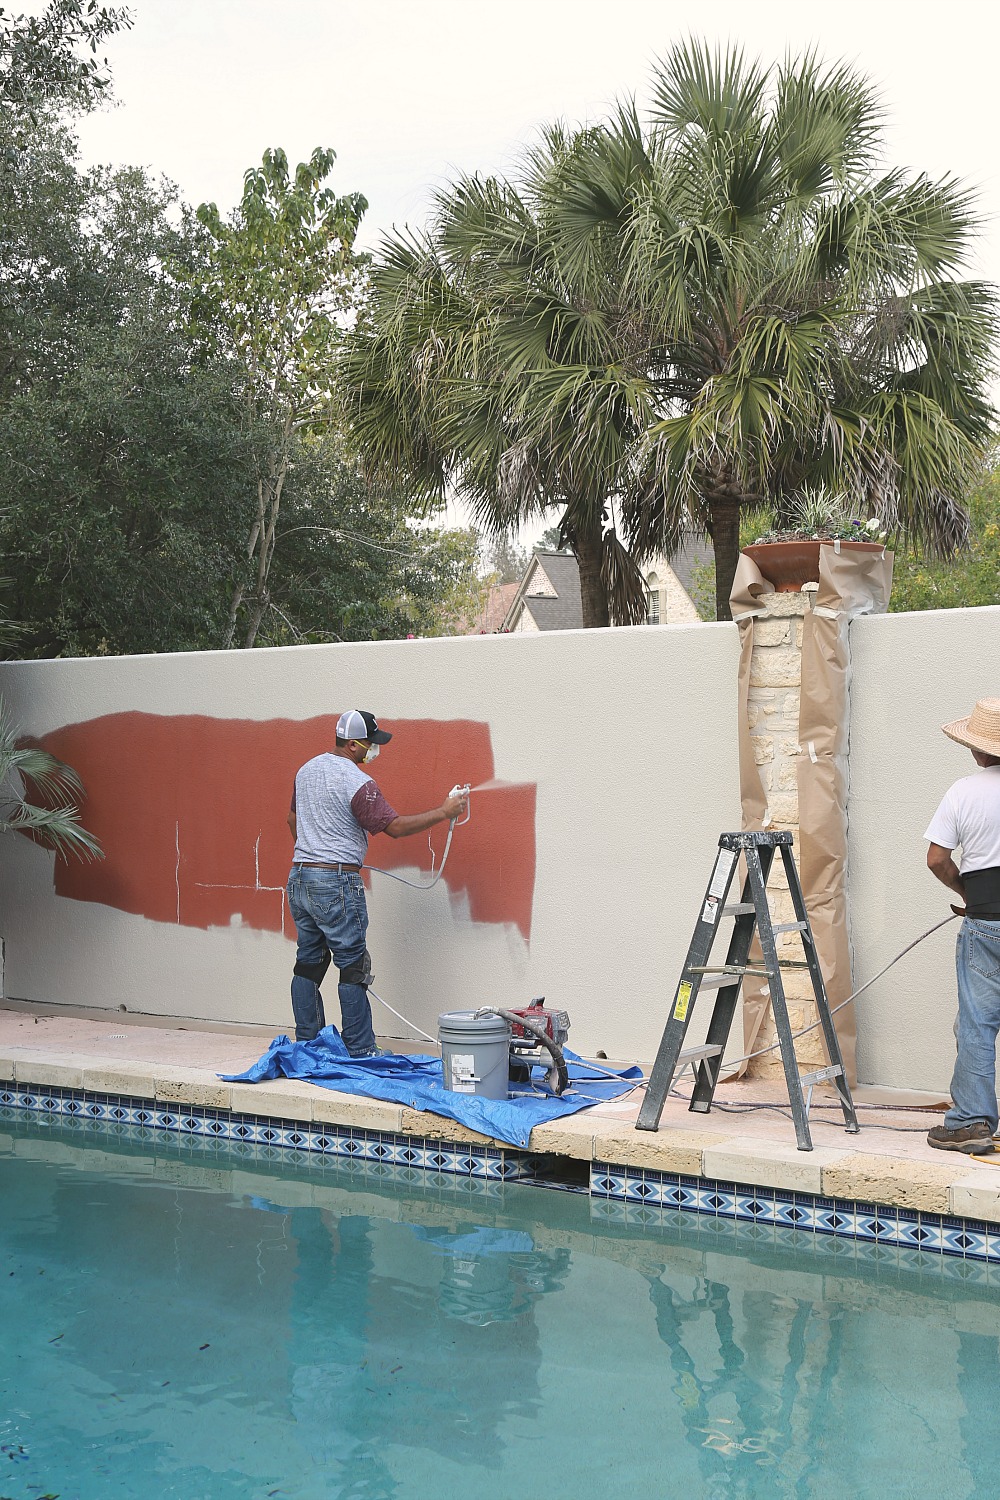
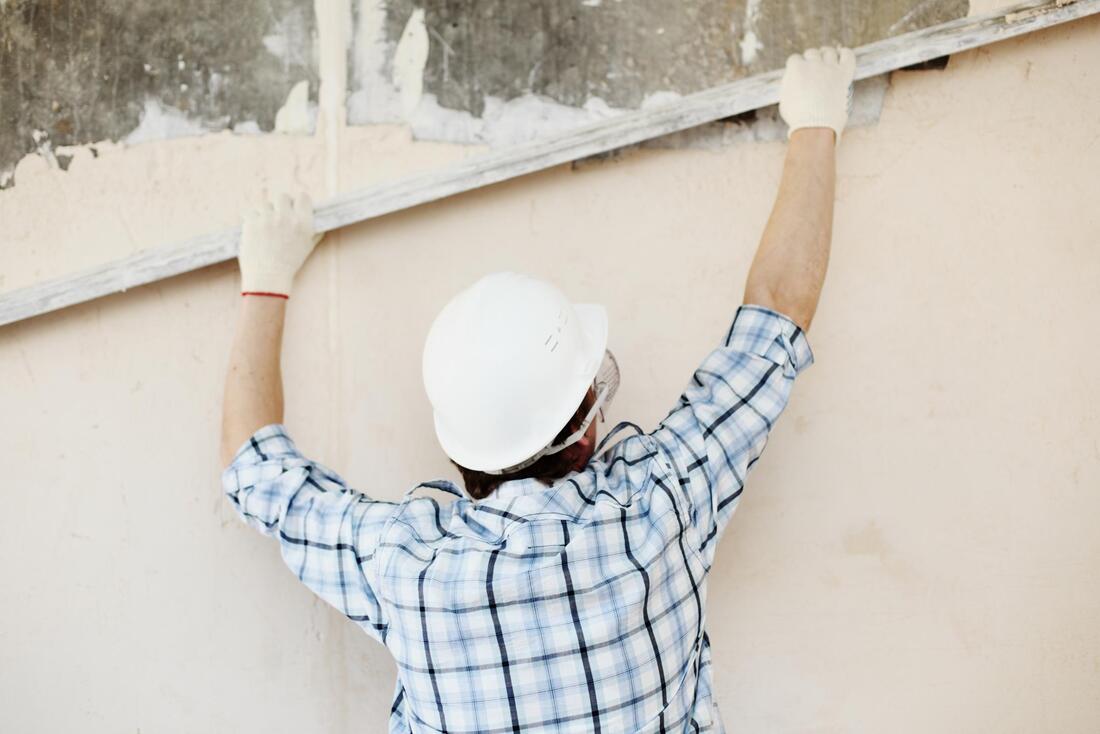
Although extremely weather-resistant and durable, over time, stucco will be susceptible to damage. A properly applied coat of stucco should last decades at a minimum, but when large cracks start to develop, it is important that you act quickly before more of the wall becomes damaged. Serious stucco damage is nearly always caused by water intrusion into the interior of the wall, which can be caused by improperly installed stucco, previous amateur repairs, or simply the passage of time.

PROFESSIONAL STUCCO INSPECTIONS

Part of the way we like to add value to our company’s services is by offering our clients up-front, no-obligation quotes. Get in touch with us to book a complimentary professional stucco inspection.

We’ll send a certified professional to your property at a time that’s convenient for you. With our trained eye, we’ll investigate the extent of the damage, being careful to check for any signs of a mold problem beneath the surface


Stucco Repair

Stucco is the first thing that comes to anybody’s mind when thinking of building a home.  Stucco has been around for some time and is here to say thanks to the beautiful finish it can give the exteriors.  Though long-lasting a stucco siding requires regular maintenance to retain its sheen.  Installing stucco might not be complicated, but it is a work that should be handled only by expert stucco contractors.

handling stucco repair and installations around the area and popular for top-quality stucco repair services. The testimonials of our countless satisfied customers vouch for the claim that we are the best stucco repair contractors in the town. We have handled stucco repair projects of all kinds from minor stucco patch repair to complete stucco redoing.  Our exposure to different types of stucco and designs ensure that we understand stucco in and out and so any project we take up is completed to perfection.

​Stucco is our passion. We offer our customers a range of stucco repair services to choose from. It can be a minor stucco crack repair or a stucco foam installation or a complete stucco installation

Hardcoat Stucco Repair

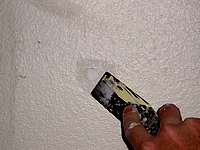
​The composition of hardcoat stucco makes it more resistant to water damage. It is porous and hence doesn’t retain water. So, it is a recommended product in moisture-prone areas.  Though chances of water damage are less, hardcoat stucco requires maintenance on regular basis. Else it might develop cracks on the surface, and stucco cracks even if minor shouldn’t be ignored. We provide the perfect stucco crack repair service for any cracks on your hardcoat stucco. The cracks that you see on your walls might be because your stucco was not installed properly in the first place. That is why it is always recommended to get an expert stucco contactor to install your stucco. Just imagine the time and money you could have saved on the stucco crack repair that keeps occurring because of the wrong installation

EIFS Repair

​Do you know the best way to determine the type of stucco you have installed? Just tap the same, and you would get an idea. EIFS (Exterior Insulation and Finishing System) will sound hollow because it is lighter in nature.  However, the biggest drawback of EIFS is that it retains moisture and develops water damage issues faster than hardcoat stucco.  Stucco contractors get more calls to repair stucco cracks in EIFS than in hardcoat. Apart from its water sensitivity EIFS is also softer than a hardcoat, hence dents and exterior damages are more frequent in EIFS. Painting and stucco patch repair are usually recommended for such exterior stucco repairs. An expert can guide you in choosing the ideal paint for EIFS considering its water sensitivity, hence please ensure that only good stucco repair companies handle your EIFS stucco, because the complaints are more frequent in EIFS. So, if not dealt with prudently your minor stucco crack repair might cascade into a major one. Assign your stucco repair service to us for making your EIFS stucco as good as new.


Why Patching Or Painting Your Stucco Can Be Dangerous

Patching or painting your stucco can be very dangerous and if done incorrectly, may lead to structural damage and expensive repairs. Unlike other home building materials, cracks in stucco should not be painted over or quickly filled in because there is always the possibility of covering dangerous water damage that may threaten the structure of your home. This is very dangerous and a lack of experience may lead to far more serious issues, which is why it is always better to hire a professional stucco contractor to complete inspections and repairs of stucco for you.

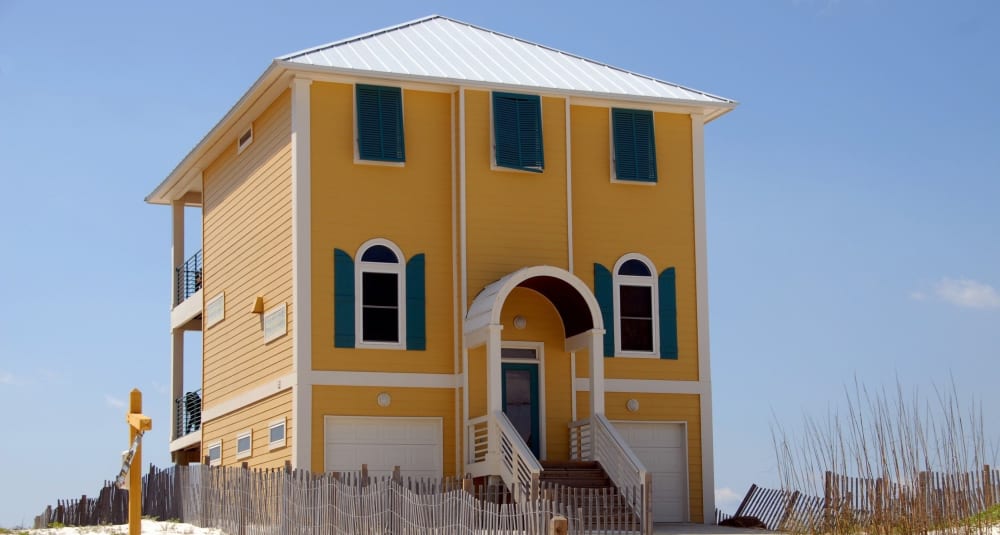
Stucco homes are beautiful but will experience wear and tear from different elements over time, especially in temperamental climates. Moisture and cold can both cause problems and the continuous cycle of warm and cold weather will cause stucco to expand and contract, resulting in cracks. As water and ice enter these cracks, they will become worse over time and allow moisture to enter right into the walls of your home, which will lead to mold and rotting and this is one of the reasons why you cannot just patch or paint over stucco, no matter how tempting and easy it may sound. Cracks may be an indication of a much bigger and more serious underlying problem, like water damage, and if that is the case, it must be looked at so that the proper repairs can be made.

Reaching for paint or caulk whenever you see cracks in stucco may seem like a good idea but in reality, it is not because you’ll only be covering up a problem instead of fixing it and this can be both problematic and dangerous. Patching or painting over stucco is a lot like ignoring the underlying problem while creating a larger one and you need to remember that both painting and patching are temporary cover-ups and not actual solutions, so if there is existing water damage already in your stucco, then the paint will only peel and crack again. No amount of patching or painting will prevent future cracks and if the root of the problem is not fixed, then you’ll just be wasting your time.

Many people think they’re doing the right thing by filling in the cracks so that moisture cannot get in but they forget that this can seal in any existing moisture, which is something you definitely want to avoid because that moisture will seep into the wood frame of your home’s structure and lead to rotting. Moisture will affect other porous materials of your home’s structure as well, so it’s a very dangerous situation that you want to prevent from happening.


REPAIR YOUR HOME’S STUCCO

Make the Stucco of Your Home Last for Years

With repairs and regular maintenance, you can make the stucco on your home last for years. If you have noticed moisture seeping through the walls has begun to damage the stucco—causing it to either crack or deteriorate, it is time that you contacted our team. Beyond just repairing the stucco though, our team can also address any issues with hard water that may be coming from your plumbing system. This hard water can damage your home’s plumbing, which can lead to leaks down the line and further wall damage.

Your deck or patio is an outdoor extension of your home. But being exposed to nature, it needs regular maintenance and repairs to keep it a safe, pleasant place for entertaining guests

Doors are the entry and exit points to many areas in your home and they should always work correctly and look great. Whether you need repair services because your door doesn’t work or look like it used to, or you’re ready to have a brand-new door installed

Toilets, Screen Doors, Drywall, Tile & More

When stuff breaks, we fix it. Our home repair contractors can save you the time and money it would otherwise cost to find and install a replacement for your broken fixtures and household items. We believe in a convenient, one-call solution where one call can get one of our house repair contractors on the way to fixing whatever you need fixed.

High Performance Exterior Painting

Tips for Choosing the Best Exterior Paint

Summer is here and that means we can finally tackle those big outdoor summer projects! If you’re planning on painting the exterior of your home this summer, I wanted to share some important tips that will help you when choosing the best exterior paint for your home that will last years.

It’s not easy deciding on a high quality exterior paint for the home because there are hundreds of different exterior paint products on the market. I know it’s seriously overwhelming and I’m gonna make it real easy for you today and help you sift through so you can zone in on the very best exterior paint for your project.

If you’re having your home professionally painted, it is critical that you are involved in the decision making process of what paint to use on your home. Don’t let your painter make that decision alone!  A good professional painter will welcome talking you through the paint decision so both of you are happy with the job! It’s also very important to ask your painter to paint a sample of the paint he/she is recommending for you to makes sure you are happy with the coverage

NOT ALL EXTERIOR PAINTS ARE EQUAL

I have learned so much over the years about exterior paint products from my own projects, client projects and also working with paint companies. Unfortunately, I have also learned the hard way that not all exterior paints are created equal. Nothing is more frustrating than spending a fortune to have your house painted and you have to repaint within 2-3 years!

DURABILITY

The most important factor when choosing an exterior paint is durability.  You may be surprise to know that a highly durable exterior paint finish should last at least 5-10 years. Yes! You read that right! The best exterior paint that is applied properly can last up to 10 years! It is possible!


TIPS FOR YOUR PROFESSIONAL EXTERIOR PAINTING PROJECT

Exterior house painting projects are a big deal. While the interior of your home is only seen by friends that you invite in, the outside of your home can be seen by anybody and everybody. You want it to have impressive curb appeal. Nobody wants to be “that house” on a street of well manicured lawns and beautifully painted exteriors.

House painting, whether interior or exterior, takes some prep work. Once you have taken the time to choose the perfect paint color, you will want to make sure your project goes smoothly. A professional painting company like New Life Painting will follow these, and other steps, to make sure that your exterior painting job is done in a timely and professional manner with beautiful results.

Clean: Even if the outside of your home looks clean to you, a professional will know to take the time to pressure wash the surfaces that you will be painting. Painting over a dirty surface will leave the exterior of your home looking rough and dirty. The house will need to fully dry for a day or two before painting

Prep other surfaces: If your painting team is painting wood trim or an area that has been painted before, these surfaces will need to be prepped for the job. A good painting company will scrape away any loose or flaky paint from these surfaces and sand down these areas to be sure that your new paint color will go on smoothly.

Watch the weather: Weather can be slightly unpredictable in most places, including Santa Ynez, Pismo Beach, and other Central Coast cities. If latex paint is involved in your painting project, weather that is too cold or too hot can keep the paint from adhering to your surface or compromise its durability. Moisture from rain or even heavy dew can negatively affect an exterior paint job, so a few good days of weather and your professional painters can get to work.


Smart Tips for Painting Your House

Few home-maintenance projects are as important as exterior painting because paint and caulking form the first line of defense against rain, snow, and ice. And a nice paint job will enhance the curb appeal and resale value of your home, too.

You want to repair and repaint as soon as you notice paint starting to crack, blister, and peel. Ignoring these problems will lead to a much more extensive—and expensive— job. Below are seven exterior painting tips every homeowner should know, whether you’re planning to paint the house yourself or hire a pro.

Paint Options

There are two basic types of exterior paint: water-based latex and oil-based alkyd. Latex cleans up with soap and water, dries quickly, has low odor, and remains flexible longer so it’s less likely to crack. The best quality latex paints contain 100 percent acrylic resins.

Paint Prices

There’s no absolute formula for picking the best paint for your home. Most paint manufacturers offer a wide variety of paints ranging from good to better to best. As a general rule, budget how much you want to spend on the project and then buy the best paint you can reasonably afford, because cost is an excellent indication of quality. Expensive paints contain more pigments than bargain paints, so they produce a thicker, longer-lasting, more protective coating

Read the Label

Few homeowners bother reading the tiny print on the paint can label, but they should. There’s a wealth of information printed right on the can that can help you produce a beautiful paint job. Pay particular attention to the instructions about prepping the surface and outdoor air temperature. Most paints shouldn’t be applied when the temperature is 50 degrees F or colder. But some paints are specially formulated for application when the temperature is as low as 35. Just take the time to read the label before you start painting and before the label becomes smeared with paint and impossible to decipher.


House Painting: Everything You Need to Know

House painting is often an important step of the moving process. If your home or rental property is in need of a fresh coat (or two) of paint, you’ll have to decide how you want to proceed. Do you hire a professional painter or break out the ladder and purchase the exterior house paint yourself? Depending on the scale of the project, your time frame, and whether it’s an exterior or interior house painting job, the answer might be different. Read up on our house painting tips and tricks to see what choice is the best for you.

House Painting Options: Hiring Help vs. DIY

When deciding whether to hire help or take on a house painting job yourself, there are a few factors to consider. Depending on your level of ambition, certain circumstances may prompt you to leave house painting up to the professionals. Think about your painting needs and see how the following situations apply to you

Scale

Scale has one of the biggest impacts on deciding whether to hire painting help or take matters into your own hands. If you want to paint your home, consider whether or not this is a realistic task to take on yourself. For instance, is your house multiple stories or a townhouse? Do you just want to paint the kitchen or the entire exterior? Once you factor in the time it takes to do the prep work and lay down multiple coats of paint, a DIY paint job can get complicated. If the house painting job is extensive, you may want to leave it to professionals

Current state of paint

Painting a brand new house with smooth surfaces dramatically reduces prep work. On the other hand, if you’re painting an old home with peeling walls or siding, it’s going to take a lot longer. When deciding whether to hire house painting professionals or do it yourself, take the current state of the paint into consideration. If you’re not up for the challenge of scraping and sanding for hours, you should hire help to get the best results

Interior vs. exterior

Needless to say, an exterior paint job tends to be more complicated. Indoors, you don’t have to deal with the elements. When painting the exterior of a home, however, you have to think about tough to reach places and the unpredictability of the weather. If you just want to repaint your front door, we trust that you’ll be able to do it yourself. Contrarily, a full exterior makeover requires professional help


What to Look for in a Professional House Painter

It’s true that a handy homeowner can tackle many tasks around the house without professional help. However, house painting isn’t one of them. Repainting your home, especially the exterior, is a monumental task that requires extensive use of ladders and other equipment to safely reach high heights, not to mention years of experience mastering the precise prepping, priming, and painting techniques. For these reasons, the advantages of professional house painting far outweigh attempting a DIY job

Do you provide free estimates?

While the cost shouldn’t be your only determining factor when hiring house painters, free estimates allow you to shop around before committing to one painter or another. Keep in mind that a low price doesn’t guarantee quality products or a job well done. You’ll want to ask for details about paint grade and warranties to ensure you’re not comparing apples and oranges.

Will you keep me up-to-date on the progress?

Exterior house painting and multi-room interior projects are quite extensive, possibly taking more than one day to complete. Your painters should provide you with timely updates about their progress and whether they expect to complete the job on time. It’s also reasonable to request daily start and end times, especially if you want to be at home while the painters are working.

Do you clean up after yourselves when the job is complete?

The last thing you want is to be left scrubbing mud off the floor or paint splatters from your windows. Accidents happen, but true professionals take measures to prevent them, such as by wearing shoe covers and laying down drop cloths on furniture, counters, and floors. Before they leave, your painters should thoroughly scour the work area for messes and vacuum or sweep up any dirt or dust they left behind

Can you help me find the right paint color?

After years of experience on the job, professional painters should have a keen eye for what hues look best together. If you’re not sure what color to paint the walls or exterior of your house, it’s fair to ask for advice. Painters can also recommend particular brands or grades for the work at hand. Remember, when it comes to paint quality, you get what you pay for.

Do Drywall Repairs To Make Better Wall

10 Tips for Patching Drywall

Before you paint a wall you have to prepare the surface, which inevitably involves patching. It’s one of the most important steps. But sometimes it takes more than just a can of spackling and a small putty knife to get good results. Here are some wall patching tips and products that will help you speed up the job, avoid problems and end up with a flawless wall.

1.Use Self-Priming Filler

Patches made with traditional patching materials need to be primed with a sealing-type primer before painting. Otherwise the patched areas could show through the finished paint job as foggy spots. But if you patch with a self-priming patching material, you can avoid this extra step. There are several brands; just look for the words ‘self-priming’ or ‘with primer’ on the container.

2.Use Setting Compound for Big Holes

It’s fine to fill screw holes and other small wall dings with patching compound, but for dime-size and larger drywall repairs, and for holes that are deep, it’s best to use a joint compound that sets up by a chemical reaction. These are available in powder form with setting times ranging from five to 90 minutes. The reaction starts when you mix in the water, and the compound hardens in the specified time. The five-minute version is nice because you can buy the powder in a convenient 5-lb. box, and the compound hardens quickly, so you can apply another coat right away. Remember, setting-type compounds are harder to sand than regular patching materials, so make sure to strike them off flush to the surface when you fill the hole. You’ll find setting-type compounds wherever drywall taping supplies are sold.

3.Make a Dent for the Patching Compound

When you remove a nail, drywall anchor or picture hanger, there is usually a little ridge of old paint or drywall sticking out that’s hard to cover with patching material. The solution is to make a dent over the hole, and then fill the dent. Most good-quality putty knives have a rounded hard plastic or brass end on the handle that works perfectly for making the dent. The rounded end of a screwdriver handle or the handle of a utility knife will also work. Press the handle against the hole and twist it slightly while applying pressure to dent the surface, or if you have good aim, use your denting tool like a hammer.

4.Cover Cracks with Repair Spray

Stress cracks usually show up around window and door openings. The cracks are the result of framing movement and are hard to fix permanently. But using spray-on crack repair is a good way to at least extend the life of your repair. The spray forms a flexible membrane over the crack that can stretch and relax as the building moves.

If the crack is open, fill it first with patching compound. Then follow the instructions on the can to cover the crack with the crack-repair spray. Let it dry and cover it with paint to finish the repair. You’ll find crack-repair spray at hardware stores, paint stores or online.

5.Fill a Row of Holes with One Swipe

Professional drywall tapers always fill a row of screw holes with one long stripe of joint compound, rather than filling every screw hole separately. In addition to being faster, this method disguises the screw holes better and makes it easier to sand the patch. Instead of sanding around each hole, you can just sand the whole stripe.

You can take advantage of this tip whenever you’re filling a series of holes that are lined up and close together, like the holes left from a shelf standard or a row of pictures. Use a 6-in.-wide putty knife and apply the compound as shown in the two photos.

6.Skim-Coat Areas with Lots of Dings or Holes

In areas with a lot of dents and holes, like in the mudroom where boots, hockey sticks and golf club bags leave their marks, don’t try to fill every dent individually. Instead get a wider taping knife—a 6-in.-wide putty knife will do—and simply skim the entire area with joint compound. For the best results, use ‘topping’ or ‘all-purpose’ joint compound.

Mix a tablespoon or two of water into three or four cups of the joint compound to make it easier to spread. Then put a few cups into a drywall pan and use your 6-in. knife to spread it. Spread a thin coat of joint compound over the area. Then scrape it off, leaving just enough to fill the recesses and holes. You may have to apply two or three coats to completely fill holes, but the thin layers dry quickly and are easy to apply. Sand the wall after the final coat dries.

7.Seal Exposed Drywall Paper Before Patching

When you peel off old adhesive or self-sticking picture hangers, you often tear off the top layer of drywall paper, leaving fuzzy brown paper exposed. If you try to patch over this without sealing it first, the water in the patching material will cause the paper to bubble and create an even bigger problem. The key to patching torn drywall paper is to seal it first with an oil- or shellac-based sealer (KILZ Original and BIN are two brands). These are available in spray cans or liquid that you can brush on. Don’t use a water-based product or you’ll likely have the same bubbling problem. After the sealer dries, sand the area lightly to remove the hardened paper fuzz. Then cover it with patching compound as you would for any other wall repair.

8.Use Stick-On Patches for Midsize Holes

There are all kinds of ways to patch doorknob-size holes. But the quickest and easiest is to use one of these stick-on mesh patches. They’re available in a few different sizes at paint stores, hardware stores and home centers. To use the patch, just clean the wall surface and sand it to give the surface a little ‘tooth.’ Then stick the patch over the hole and cover it with two or three thin layers of joint compound. You can speed up the process by using setting-type compound for the first coat.

9.You Can Spray on Wall Texture

Orange peel texture on walls or ceilings is nice for hiding defects and adding interest, but it can be a real pain if you have to make a big patch. Luckily you can buy spray-on orange peel patch that will allow you to match the texture of the patch without hiring a pro. You can buy the patching material in a few different versions: regular, quick-drying and pro. The pro version gives you the most control over the spray pattern.

Make sure to practice spraying the texture onto a scrap of drywall or cardboard to fine-tune your technique before you spray it on the wall patch. Let the test piece dry before you decide whether you need to adjust the nozzle for a coarser or finer texture. Remember, you can always add another coat if there’s not enough texture after the first coat dries.

10.Use a Raking Light When Patching Walls

When you’re preparing your walls for paint, position a bright light so that the beam rakes across the wall as shown here. This will accentuate any defects, making them easier to see and fix, and will alert you to patches that need more fill or additional sanding. If your walls look smooth in raking light, you can be sure they’ll look awesome when you’re done painting.


Here’s how to repair and patch damaged drywall

No matter the age of your home, drywall damage will occur. Whether it be from doorknobs, roughhousing, minor water damage, moving furniture or mounting hardware from artwork, mirrors, TV mounts, window treatments, etc., it will happen. Minor damage is a relatively easy fix. Small screw or nail holes can even be patched with white toothpaste and touch painted to blend in.

Repairs to areas of major water damage are best left to the pros. You never know what kind of damage is lurking behind that drywall. There could be mold and that is something that is best left to a professional mold remediation expert.

The age and condition of the paint on your wall and stored paint from when it was applied are really the key factors in how quickly you will finish drywall repair projects. But it’s the quality of the patch work that is critical to restoring drywall to look like new. The paint will only look as good as the surface it’s applied to. A poor patch with a poor texture match will stand out more than you’d expect, even with the best paint coating.

Nail holes in a wall where a picture used to hang can be filled with spackling paste, caulk or even toothpaste for an especially tiny hole; let it dry and sand it down before repainting.

For dents or holes larger than a quarter, drywall texture and drywall tape or mesh will be required to complete the project. Anything over a 2-inch square will require a scrap drywall piece to cut a filler piece along with the following tools:

Utility knife or drywall saw. Having both can come in handy, but you won’t need both if you only own or have access to one.

  • 12-inch straight edge.
  • A level.
  • 4-inch putty knife.
  • Coarse sponge or sandpaper.

Optional:

  • Acrylic caulk if the patch is matched up to another material/surface such as a countertop, shower, tile finish, etc.
  • Drywall pan if a large amount of mud will be required.
  • Texture spray for orange peel finishes.


Pro Tip: How to Repair Torn Drywall Paper

So you finally got around to removing that paneling or tile and RIP! Off comes some drywall paper (also called facing) along with it. Now what started as a fun update project has turned into an annoying repair project. The damage isn’t deep, but it’s unsightly. So what’s the right way to repair it? Well, why don’t you ask us a hard question? We’ve tackled patching a hole in drywall, and this will be easier than that. How to repair torn drywall paper and patch it up is a Pro tip you’ll want in your back pocket.

Well That’s Not Tearable

  1. Remove loose paper with a razor knife.

You’ll surely have some ragged or hanging paper left from the tear, so use a razor or utility knife to remove it. The edges of the tear should be smooth against the wall.

  1. Important: seal the exposed gypsum. 

The gypsum will absorp moisture from latex paints, so you must seal it to prevent blisters. You can use some drywall primer and sealer or even old oil-based paint that you told yourself you’d use or throw out but haven’t done either.

  1. Cover the area with joint compound.

Use a putty knife to spread a thin layer of joint compound (mud) over the area. You’re not just filling the torn area, you are creating a new surface so the joint compound should extend an inch or so past the edges of the tear. Apply the mud as evenly as possible but you’ll find that it may look uneven or pock-marked, especially if you’ve never done this before. Not to worry – read on.

Last Steps: Repair Torn Drywall Paper

  1. Sand the area.

It’s common to use a fine sandpaper such as 120 grit to sand the area. For larger areas you can turn to a bigger tool like the Ridgid Gen 5X random orbit sander. We’ve even used a multi-tool with a sanding accessory. However, we prefer a wet sand before the joint compound has completely cured. A wet sand doesn’t create fine airborne particles or dust on floor, and it gently removes the area’s high spots and fills the low spots. The curing time depends on temperature and humidity, but we like to give the area around 45 minutes to harden up. Touch the compound to make sure it’s not so wet that it comes off on your fingers. It should be firm but pliable. Use a damp sponge to gently sand the area and create a smooth surface with the rest of the wall.

  1. Apply another layer of joint compound.

 What’s better than one layer? Two, of course. A second layer will likely be necessary to make the mud coverage wide and smooth enough to blend in. You’ll never notice the area once it’s painted if you do it correctly. You’ll likely want to repeat the sanding step as well.

  1. Paint.

Here’s where the evidence of the tear disappears. Paint the area, and enjoy that invisible repair.


Drywall Repair – A Common Problem In Every Home

A common problem in almost every home is drywall repair. Anytime we are indoors we are usually surrounded by drywall – a less than perfect building material. It’s fragile, is easily ruined by a bit of water and can be a magnet for mould. Yes, there are water-resistant varieties now, but drywall can still be miserable. Just think of the first time you tried hanging a picture before realizing it’s not that simple on drywall.

However, we have not come up with anything better. It’s been around for decades, having replaced plaster. Plaster had far worse drawbacks. Among them, it takes forever to dry and is much more labor-intensive to install.

Drywall was a great idea because it’s like applying plaster except most of the messy work is done in a factory, and it’s shipped to your home ready to install. Before you know it the job is done, and only later do you realize that you tackled one of the most dreaded jobs of home remodeling. Repairing drywall is even easier.

No matter how well drywall is hung and finished, eventually it will need repairs. Daily life brings about all sorts of wear and tear, like doorknobs creating small holes in walls. Even if every adult, child and pet is a perfect family member and each manages to not cause any damage, natural processes will still slowly take hold.

The rigid materials that give our houses their structure eventually start to shift due to natural expansion and contraction. Drywall will crack. There’s no need to be anxious. Even extensive drywall damage is fixable, even if it means replacing large pieces. Most drywall repairs require just basic skills, tools and drywall patching mud.


Joint Compound vs Spackle, Which One Should You Choose?

Joint compound and spackle are two fantastic products that are designed to help you fix the imperfections on the walls in your home. However, when faced with the decision of having to pick between the two, which one should you choose?

Although personal preference definitely plays a role, it really comes down to what you’ll be doing with it. Before we continue though, it’s important to have a good understanding of what joint compound and spackle are.

Joint compound, also called drywall compound, is a putty that has the consistency of plaster and is designed for larger jobs. Joint compound is made by mixing gypsum dust and water into a paste. It’s usually comes in a pre-mixed container for your convenience and is commonly used for taping and finishing drywall seams. There are 4 kinds of joint compounds on the market. They include:

  • All-purpose compound: Can be used for all phases of the patching process.
  • Topping compound: Made to be spread on a wall with two dried coats of taping compound.
  • Taping compound: The first and second coat of compound you want to put on.
  • Quick-setting compound: Made to dry faster than the other compounds and works great for deep cracks and wide holes.

Spackle on the other hand is a name brand product made by Muralo Company. It resembles paste and comes in lightweight spackle and heavy spackle.

Lighter Spackle is generally made from vinyl and used to smaller fill holes made by nails, pins, and needles. Heavier spackle is made from acrylic and typically used for larger, thicker holes.

Spackle also is sold in pre-mixed containers for easy use, but for those that are interested, powdered mixes are also available. To keep the powdered mixes from going bad, make sure you only mix enough for the job you’re about to do