Make Your Home Dust Free Using House Cleaning Tips

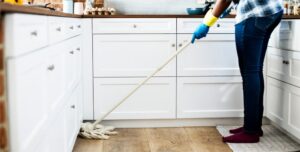
Ways To Make Your Entire Home Cleaner Than It’s Ever Been

Zap your damp or wet sponge in the microwave for one minute to kill 99.9% of the bacteria lurking on it.

Both the USDA and Good Housekeeping found this actually works; try to do it at least once a week, if not every three days or so. And if you heard that microwaving doesn’t help, well — all those news reports were inaccurate. (It’s also essentially equally effective to run your sponge through the dishwasher, on the top rack, with the heat-dry setting, if you prefer to do that instead.)

And let your sponge dry out every single night, whether your use a simple binder clip or a stainless sponge holder.

Wipe up the sticky, dusty buildup that gathers on your range hood and other appliances using a little bit of mineral oil. Just put a little bit oil on a paper towel, and wipe; it’ll come off like a charm! If you don’t like the oily residue, just use water and dish soap to clean that right up. (You can also use olive oil for this, but if you do, definitely wash it off; otherwise it might go rancid and smell bad.)

Make a paste with water and a polish cleanser to easily scrub off cooked-on gunk from your stainless or enameled gas stove.

Then shine up your greasy stove grates by letting them sit overnight with just a little bit of ammonia. You simply seal them up in a plastic bag and let it do its work — just don’t mix ammonia with any other cleaner, and do read the tutorial on The V Spot before you try this at home.

A homemade paste of dish soap, baking soda, and water is probably all you need to spot-clean baked-on stains inside of your oven.

But if you haven’t kept up with regular spot or self-cleaning, a spray-on 40-minute spray-on cleaner may be just what your oven needs Don’t worry, it’s fume-free. Some reviewers mention that they got better results by leaving it in their (open) oven overnight, or by doing multiple coats

Wrap your hard-water-stained faucets in vinegar-soaked paper towels to dissolve the minerals so they wipe off in one go

And banish hard water from your faucets by attaching a plastic bag filled with vinegar, using a rubber band — or if they’re heavily stained, substitute the vinegar for a more intense mineral cleaner.


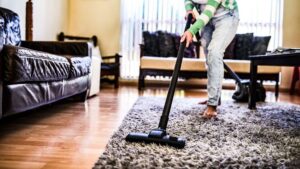
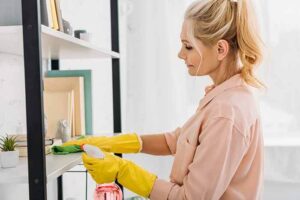
How to Clean a Living Room So You Don’t Gross Out Your Guests

How to clean a living room is a question any conscientious homeowner will ponder. Don’t your family and guests deserve a pristine place to hang out in? Don’t you? This showpiece area of your home cries out for white-glove treatment—but let’s get real, no one has white gloves anymore.

How to clean a living room’s lights, lamps, and chandeliers

When tackling any room in the house, clean from top to bottom, says Jan Dougherty, author of “The Lost Art of House Cleaning”—otherwise you’ll have to clean the floors twice. Therefore, the best starting point in a living room is to look up at its light fixtures. First off, whatever type of lights you have, don’t forget to dust the lightbulbs at least once a month—dirty bulbs shed 30% less light than clean ones, according to the U.S. Department of Energy. The best way to clean them is with a dry cloth; don’t spray cleaning solutions directly onto the bulb, which could damage it, according to the GE Lighting Institute.

Beyond the bulb itself, hanging lamps and chandeliers can be easily cleaned with a feather duster; crystal chandeliers should be thoroughly washed once or twice a year. If the chandelier is lightweight, you’ll want to take it down and lay it on top of a towel spread on a table. Mix 1 ounce of liquid dish soap with a quarter-cup of white vinegar and 3 cups of water. Put the mix in a spray bottle, spray each crystal, and let it dry before polishing with a microfiber cloth.

How to clean leather furniture

Then, to remove spots or stains, dip a clean microfiber cloth in a lather of soap and water and rub the surface; then dry it with a clean towel. To condition—a process that helps the leather stay clean and pliable—use a dab of coconut oil on a cloth and gently rub it in with a circular motion

How to clean upholstered furniture

Upholstered furniture comes with a code that shows what products should be used to clean it. This code can be found on the care tag, which is typically on its underside. Here’s a cheat sheet on what the letters on this tag mean:

W: Clean with water.

WS: Clean with water and dish soap.

S: Vacuum and spot-clean only; do not apply water.

X: Vacuum only.


Workplace Housekeeping

Why should we pay attention to housekeeping at work?

Effective housekeeping can help control or eliminate workplace hazards. Poor housekeeping practices frequently contribute to incidents. If the sight of paper, debris, clutter and spills is accepted as normal, then other more serious hazards may be taken for granted. Housekeeping is not just cleanliness. It includes keeping work areas neat and orderly, maintaining halls and floors free of slip and trip hazards, and removing of waste materials (e.g., paper, cardboard) and other fire hazards from work areas. It also requires paying attention to important details such as the layout of the whole workplace, aisle marking, the adequacy of storage facilities, and maintenance. Good housekeeping is also a basic part of incident and fire prevention.

What is the purpose of workplace housekeeping?

Poor housekeeping can be a cause of incidents, such as:

tripping over loose objects on floors, stairs and platforms

being hit by falling objects

slipping on greasy, wet or dirty surfaces

striking against projecting, poorly stacked items or misplaced material

cutting, puncturing, or tearing the skin of hands or other parts of the body on projecting nails, wire or steel strapping

What are some benefits of good housekeeping practices?

Effective housekeeping results in:

reduced handling to ease the flow of materials

fewer tripping and slipping incidents in clutter-free and spill-free work areas

decreased fire hazards

lower worker exposures to hazardous products (e.g. dusts, vapours)

better control of tools and materials, including inventory and supplies

more efficient equipment cleanup and maintenance

better hygienic conditions leading to improved health

more effective use of space

reduced property damage by improving preventive maintenance

less janitorial work

improved morale

improved productivity (tools and materials will be easy to find)

How do I plan a good housekeeping program?

A good housekeeping program plans and manages the orderly storage and movement of materials from point of entry to exit. It includes a material flow plan to ensure minimal handling. The plan also makes sure that work areas are not used as storage areas by having workers move materials to and from work areas as needed. Part of the plan could include investing in extra bins and more frequent disposal

The costs of this investment could be offset by the elimination of repeated handling of the same material and more effective use of the workers’ time. Often, ineffective or insufficient storage planning results in materials being handled many times and being stored in hazardous ways. Knowing the workplace layout and the movement of materials throughout it will help when planning work procedures


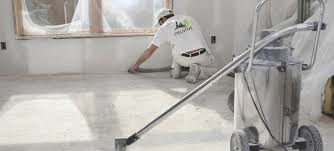
How to Clean a Bedroom (Because It’s Filthier Than You Think)

This all-important room in your home gets seriously gunky.  And even though you spend roughly a third of your life there, the bedroom likely lingers low on your list of housekeeping priorities—all of which means this restful oasis is the secret hog pit of your home.

How to clean a bedroom

Look no further than our House Cleaning Guide on how to clean a bedroom right. To find out which areas need cleaning most—and the best way to make them immaculate—we interviewed professional housecleaners to get their insider tips on how to give this room the thorough cleaning it deserves

How to clean a mattress

Your mattress is ground zero. After all, you spend a lot of time there sleeping, snuggling with significant others, maybe even scarfing down late-night snacks. But that’s all OK, provided you know how to clean the darn thing.

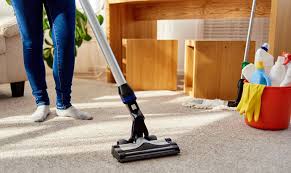
After removing all sheets and bedding, break out your vacuum cleaner. Attach the hand-held extension, then run it across the entire mattress surface, paying special attention to seams and crevices, which is where dirt, dust, and tiny particles of dead skin (eww) collect.

How to clean a mattress pad

Mattress pads come in an assortment of materials, including cotton, down, vinyl-backed, foam, and egg crate—and cleaning methods vary accordingly. In general, cotton, down, and vinyl-backed mattress pads can go in the washing machine using cold water and a mild detergent. Foam and egg crate pads, meanwhile, are more delicate and can tear if put in the washing machine; therefore, it’s best to spot clean them with a solution made from equal parts water, distilled white vinegar, and lemon juice,


How to Establish a Simple Cleaning Routine and Stick to It

You could walk into our dorm room and instantly tell whose side was whose. My roommate’s side always looked presentable and clean: bed made, desk neat, clothes put away. My side looked like a disaster area: blankets and sheets askew, books and newspapers covering my bed, and laundry only half put away. The mess on my little twin bed sometimes got so big and unmanageable that I’d just sleep on top of all my crap, like you see those crazy people do on Hoarders.

Thankfully, my roommate was quite patient with me and kindly nudged me to start routines that would keep our place looking spic and span. I soon discovered that keeping things clean didn’t take all that much time or effort. In less than 30 minutes a day, we created a haven of order and tidiness that would make Mr. Clean (and my mom) nod with approval.

For many young men heading out on their own for the first time, maintaining a cleaning routine on their own wasn’t something they had to do at home. Sure, they might have helped with chores when asked, but they probably had their mom or dad telling them what to clean and when. But keeping your dwelling space clean and tidy is important for a variety of reasons: it’s hygienic, allows you to feel comfortable having people over (and inviting in surprise guests),

Establishing a Simple Cleaning Routine

The key to keeping your place clean is to break the job up into smaller daily and weekly tasks. A lot of young men won’t clean anything for a few weeks, and then when the mess gets so huge it can no longer be ignored, have to spend a whole Saturday digging themselves out from under it. Or, the job begins to seem so enormous they can’t motivate themselves to tackle it, and let the mess grow even bigger.

What to Do Daily

Instead of letting messes pile-up, making them more of a pain in the arse to clean come Saturday morning, invest 10 minutes in the morning and 10 minutes at night in a daily cleaning routine.

Things To Look For That A Vacation Rentals Cleaning

Cleaning Guidelines for Vacation Rentals during COVID-19

As a vacation rental host or property manager, the cleaning guidelines you should follow, and how you communicate with your guests that your vacation rentals are clean and safe will be more important than ever due to the COVID-19 pandemic.

Why is cleanliness more important during COVID-19?

Cleaning has always been an essential part of running a vacation rental business. It is even more important because of the COVID-19 pandemic. According to Phocuswire, guest expectations towards cleanliness and sanitation have changed significantly due to coronavirus. Cleanliness and safety become top of mind over other considerations like price.

Cleanliness is also one of utmost priorities, especially when guests are deciding whether they should book a hotel room or a vacation home, and which vacation rental they should book if they go for the latter.

Therefore, it is important for property managers or hosts to follow guidelines to clean and disinfect their vacation rentals properly and communicate it with the guests. In this blog post, we have included the new cleaning guidelines from Airbnb, Vrbo as well as Vacation Rental Housekeeping Professionals (VRHP) and the Vacation Rental Management Association (VRMA) for your easy reference.

What is the difference between cleaning, disinfection and sanitisation?

Different guidelines have used different terms when describing the updated hygiene practices, so it’s important to first clarify exactly what is meant by them. Cleaning can remove germs, dirt and impurities from surfaces. You can use soap and water to clean surfaces and remove germs. But this does not kill germs 100%.


A Complete Cleaning Checklist Template for your Vacation Rental

Cleanliness is one of the biggest pain points of short-term letting for both guests and hosts alike. For guests, a dirty home can ruin a vacation before it even begins. But for hosts, it can tarnish their whole business’ reputation.

To make sure you don’t forget a thing, vacation rental owners and property managers should always tackle big cleaning tasks with a clear game plan in mind. Whether you do the hard work yourself or have a team of professionals to help, it’s important to structure each task and how you will carry them out.

Keeping your vacation rental clean to the highest standards goes hand in hand with pleasing your guests and ensuring a great all-round experience. We’ve prepared this guide with a handy vacation rental cleaning checklist which you can use for your next deep clean.

Supplies you may need

The cleanliness of your rental home is one of the most common concerns of your guests. But before you get too overwhelmed, take a look at the list of tools and products you’ll always want to have on hand.

A quality vacuum for carpets.

A microfiber mop with both wet and dry pads for hardwood floors.

Glass cleaner.

All-purpose cleaner for the kitchen and even floors.

Disinfectant for toilets, bathtubs, and other germ-prone areas.

Plenty of microfiber cloths.

A few scrub pads for extra stubborn grime.

A pumice stone.

A toilet brush.

Wood polish to add the finishing touch.

Think about your own rental house: are there any specific cleaning tools you need?

Your Cleaning Secret?

It is advisable to plan every detail of your cleaning duties and always keep your checklist in hands. But if you want to succeed with your vacation rental business, we also recommend asking the experts; those who already have a proven business in the rental and housekeeping market.


Guidelines for owners and property managers for enhanced cleaning and disinfection of vacation rentals

As the world reopens for travel, people will be more concerned than ever about the cleanliness of their vacation rentals. In an effort to help you anticipate and deliver the experience travelers need to feel safe while staying at your properties, we’ve compiled this list of comprehensive cleaning and disinfecting guidelines.

These guidelines were created in consultation with Expedia Group partner Cristal International Standards, part of Intertek Group, and with the Vacation Rental Management Association (VRMA). They’re based on publicly available information from the World Health Organization (WHO) and the Centers for Disease Control (CDC).

General advice

The emergence of SARS-CoV-2, the virus that causes COVID-19, has created a need to take additional cleaning and disinfection measures to help prevent its spread and help ensure the safety of travelers and partners.

Partners are encouraged to:

Use accurate, reputable sources of information including the WHO, the CDC, and local authorities

Make sure to follow local regulations, where applicable

Have a proactive plan to manage and minimize the risks associated with SARS-CoV-2 (the virus that causes COVID-19) and similar events, such as a prevention of spread of infection plan

Implement an enhanced cleaning and disinfecting of the property between stays

If using an external or professional cleaning company, communicate expectations and plans for cleaning and disinfection standards, and get periodic confirmation that they are being followed by the company contracted

Communicate to travelers on measures implemented, both pre-stay and during stay, via listing content and property information booklet

Support for guests —

Support good hand hygiene for guests and anyone involved with the property by providing sufficient hand sanitizer, antibacterial soap products at property entry points and key areas, and also encouraging handwashing regularly with water and soap for at least 20 seconds

Implement social distancing policies during check-in and check-out, and during any interactions with guests, staff, local community. When possible, encourage minimizing these interactions

Recommend removing shoes when entering the property and leaving them at the entrance (if possible, outside)

Inform guests on how they can contribute in prevention, and actions to take if they identify symptoms (refer to WHO, CDC or local government resources)

Consider providing cleaning and disinfecting products for guests to use, along with instructions; antibacterial handwash and additional personal hygiene products are also nice to have on hand for guests

If guests clean the property themselves, be sure to assess the results and the overall cleanliness of the property and to implement an additional cleaning if necessary; regardless, implement disinfection as described below


How to Properly Disinfect a Short-Term Rental

With the rapidly evolving situation surrounding the spread of COVID-19, property managers everywhere are thinking about how to reassure their guests and take proper precautions to prevent the spread of infection.

The short-term rental industry is uniquely positioned to provide assurance to guests at this time. Once a property has been correctly disinfected, the only people occupying the property are the guests themselves.

Which means that if you have guests who are concerned about traveling, you can help them feel comfortable keeping their reservations by letting them know your properties are correctly disinfected. While you certainly already have cleaning standards in place, disinfection requires an additional level of attention to detail and conscientiousness about how germs are spread

How Does Disinfection Prevent the Spread of Illness?

For many illnesses, including the coronavirus, people can spread infection before they themselves show symptoms. Transmission is possible through tiny respiratory particles that are produced when an infected person coughs or sneezes.

If the infected person coughs directly onto a surface, that is an obvious infection site. Less obviously, if an infected person rubs their mouth and then touches a surface, that site is also infected. It’s surprisingly easy to transfer respiratory particles from person to person.


Vacation Rental Cleaning Checklist

Did you know that a vacation rental cleaning checklist can help you keep your property up to par and earn you more 5-star reviews? Apparently, the vacation rental industry has been booming in recent years and standards are becoming higher and higher.

With such a huge abundance of choice, customers have become pickier when choosing a perfect vacation rental property. Even though your property is stunning, has a great location, and jaw-dropping décor, it won’t be appealing to guests if you fail to keep it clean.

To meet expectations of discerning travelers you will need to put cleanliness as one of the top priorities. However, keeping the to-do list in your head is neither easy nor necessary. To make things a bit easier, we’ve compiled a comprehensive cleaning checklist for vacation rental owners. Read on and find out what steps you should follow to prepare your property for the next guests.

How Does a Vacation Rental Cleaning Checklist Help?

Vacation homes go through dozens of travelers every month, so keeping up with hygiene is a must. Short-term rental owners should do a thorough clean every time a guest leaves their property. However, cleaning can be very complicated and tiresome. Moreover, it requires good organization and patience.

Having a comprehensive vacation rental cleaning checklist is the key to making your rental spotless. Not only will it make the whole process much faster, but it can also act as a set of instructions in case you decide to hire a cleaning service. You’ll be able to set your expectations and highlight which areas of your property require the most attention. All in all, a well-rounded checklist for vacation rental cleaning acts as a proven algorithm that works every time!

Unethical Carpet Cleaning Tricks And How To Avoid Them

Carpet Cleaning Tips and Tricks

As much as we would like out carpets to remain clean 24/7, it is practically impossible. Despite all the efforts in keeping it clean, dirt will eventually come for different reasons -maybe from stepping on it, spilling and staining. It is the reason a carpet requires to be cleaned regularly to maintain their look. It is a fact that a clean carpet adds value and authenticity to your home or office. But how clean your carpet is equally important- you should apply some of the most effects cleaning methods. Here are 10 of the best Carpet cleaning tips and tricks you can use.

  • Vacuum regularly

Every time you step on the carpet, you leave some dirt behind. Since it is not possible to deep clean you carpet regularly, you need to have a way through which you can be removing this dirt regularly to keep it looking nice. This is where regular vacuuming is recommended. A vacuum cleaner will pick dust and debris thus keeping your carpet looking good always. The frequency at which you vacuum will be dictated by how much the carpet is used. If you are a bachelor, doing it a week will enough. If you have a large family and pets, do it at least thrice a week.

  • Deal with spills immediately

Be very careful with spills. It is easy for them to become stains if they are not treated immediately. The secret to keeping your carpet clean for a longer time is dealing with any spill straight away. The best way to deal with them is soaking it with a dry sheet or using the carpet cleaner before it soaks in. You must also be wary of how clean it. The worst that you can do to your carpet is trying to rub off the spill. This will drive it further into the carpet making it hard to clean and may result into a stain.

  • Use the right solution

Use of the wrong solution is a common mistake in carpet cleaning. For the carpet to be cleaned properly, the right solutions must be employed. In many cases, the manufacturer will recommend the right solution to be used. Most of the suggested solutions are manufactured specifically for those carpets. Most people will be tempted to go for cheaper solutions that are poorly manufactured. Others may opt to go for homemade solutions. These solutions are likely to damage the carpet either by fading or tearing it with time. Some may leave behind a foul odor even after rinsing several times.

  • Test for solution’s colorfastness first

If it is the first time to clean with a solution, it is important to test its colorfastness first. Some solutions can destroy your carpet mostly by fading its color. You need to check out if the carpet color will be affected by the solution. Start by cleaning small area first and see how the detergent works. You may also use a white towel to rub the carpet to find out if there will be any color on it. If at all there will be even small traces of carpet’s color on the towel, you should avoid using that solution since it will fade the carpet. It is also likely to lower the lifespan of your expensive carpet if used.

  • Pre-treat if necessary

If you don’t clean your carpet regularly, pre-treating it before actual cleaning will be required. Sometimes the carpet may be extremely dirty and intensely stained for regular cleaning. Pre-treating helps in soaking the stain and dirty for easy remove. You need to apply the pre-treatment solution on the heavily stained or soiled areas and allow it to soak in for a moment. This will make it easy for the cleaning exercise and save on the cleaning solution used. It is also worth noting that pre-treating reduces wear and tear associated with the vigorous scratching of the carpet on heavily stained areas.


When can i put down furniture after a carpet cleaning?

Once your carpet is professionally cleaned, you will need to wait a few hours before you can resume normal day to day activities as well as putting the furniture that goes into the room with the carpet back. The general rule of thumb is that you should wait about 24 hours before putting the furniture back on the carpet. This will ensure your carpet is fully dried and ready to go. You should also consider purchasing waterproof protectors beneath the legs of the furniture. These protectors let you replace the furniture immediately after the cleaning.

WHEN CAN I WALK ON THE CARPET AFTER A CLEANING?

After your carpet has been professionally cleaned, you will want to wait at least 6 hours before you can walk on it. This way it gives the carpet enough time to dry in most areas that can handle walking. The time is increased to 24 hours for furniture because they are normally heavier and stay in one spot rather than moving across the carpet. If you need to walk across the carpet, then you should wait 30 minutes after the cleaning finishes to walk on it. For extra protection, remove your shoes and walk on the carpet with clean socks, preferably white.


What Is Carpet Steam Cleaning?

Steam cleaning carpets is preferred by many people because it only uses heat and pressurized water or steam to remove ground-in dirt and other particles. The professional will use a truck-mounted steam cleaner in most cases to propel heated water and steam into the carpet. This combination of high pressure and a high temperature effectively dislodges particles that have been cleaning to carpet fibers. Some commercial steam cleaners have an agitation feature to dislodge more particles. A powerful vacuum then extracts the moisture and the loosened particles.

The Pros and Cons of Getting Carpet Steam Cleaned

As you explore the best methods for cleaning carpets, the pros and cons of various steam cleaning methods should be reviewed. When professional cleaning services are used, steam cleaning is an effective way to remove ground-in dirt, and it is even effective at removing mold and mildew. Because the truck mounts generate substantial power from the commercial-grade carpet cleaning equipment, more water and dirt is extracted than what a consumer-grade carpet cleaner may be able to remove. Furthermore, the drying time is minimal, and related staining is not a concern if the carpet has adequate time to dry before you walk across it. Steam cleaning is an effective way to rejuvenate carpeting and to extend its life, but it is not effective at removing stubborn or deep stains.


Reasons Why Your Carpet is Respotting

There are two main reasons why your carpet shows stains after giving it a thorough scrubbing and shampooing. They are: wicking and residue. Let’s see how each manifests itself and how to tell one from the other.

Wicking

Stains from wicking are deep and come from the core of your carpet. When you spot such a stain, it means that the carpet’s fiber, pad, and back are all soiled.

As you scrub a notorious stain, there are chances of using excessive water during rinsing. It leads to saturation of the stained area, and the excess moisture finds a way into the padding and backing of the carpet. When the water reaches into the depth of the stain, it is discolored, and the dirt spreads outwards.

You may try to rinse your carpet as many times as possible, but the deep stain will keep wicking dirt to the surface. As the carpet dries, the dirty water wicks to the top, and you will see ugly stains staring back at you.

When the spots appear right after the carpet dries, you can be sure that wicking is the culprit. It is as a result of over rinsing and saturation of the carpet’s fiber, padding, and backing.

Residue

Residue stains are shallow. They actually come from the carpet’s fabric. Typically, these are the remains of detergents you use while cleaning. These stains are common when you use traditional cleaning and rinsing methods, which leave behind soap and shampoo residue that could even result in mildew.

The residue will attract all manner of dirt and dust. It can turn out to be a nightmare for those living in areas with high traffic. Anyone stepping on the carpet in their shoes will leave soil in the fabric.

As long as you are using convention carpet cleaning methods, the residue never goes away. Even if you try vacuuming it, the stains will keep showing up.

You are dealing with a residue problem if the stains appear a week or longer after cleaning. The sad conclusion is that the cleaning method you are using cannot take out the residue..


What Is Carpet Shampooing?

Carpet shampooing is similar to steam cleaning in that high temperature and high pressure are combined to clean the floor, and this cleaning method adds the additional element of carpet shampoo. In many cases, this is a dry foam cleaning agent, but your professional may use an alternative shampoo method. These elements are combined to create a thick lather that effectively loosens dirt so that it can be extracted. The cleaning machine usually has rotating brushes that provide suitable agitation to loosen more dirt and even to scrub away deep stains that have been engrained in carpet fibers. Carpet shampooing includes the additional step of rinsing the carpet with fresh, hot water. This moisture must then be thoroughly extracted with a powerful vacuum.

Use Post Construction Cleaning For Your New Office

Post Construction Cleaning For Your New Home Or Office

Professional cleaners could use their staff of washing authorities and state-of-the-art cleaning gear to clean up the dust, soil and dirt off the conclusion rapidly prior to the furniture and furnishings could be used or installed. The surfaces would have to be washed before painting as the clear presence of dust or muck would not let the most effective paint to keep for long. The floors would have to be washed and refined ahead of the carpets can be laid. The windows would need to be washed ahead of the curtains may be set up. The ceilings would need to be wiped before decorative lightings can be installed.

If you should be searching for Post structure washing, contact any skilled solution who will help you out in handling the task. They are empowered with teams of washing authorities and modern gear that can effectively conduct the cleaning task. Qualified post construction washing authorities totally clear the creating when contractors or renovators leave the premises. They offer cleanup solutions like cleaning up surfaces, removing dirt, discarding dust and remaining components. You can just curl up after employing an expert solution who can do it all for you.


Post Construction Cleaning Process

Just as no two construction jobs are the same, no two cleaning jobs are either. Therefore, most services change their process to best meet your needs. However, there are generally some guidelines that they follow.

This may include a rough clean, which takes place during the construction before the finish work is complete. This can include cleaning plywood 2 or concrete floors prior to the new flooring going down or scrubbing walls and preparing surfaces. Some rough cleans also are done at the end of construction and involve the removal of any trash, debris, or hazardous substances. Not every construction clean needs a rough clean, but many do to some degree.

The interior finish clean is next and, generally, involves cleaning all surfaces in and around the construction zone. This includes vacuuming and dusting all surfaces, such as baseboards, the interiors and tops of cabinets, and furnishings. Bathrooms, countertops, and cabinets are all cleaned from top to bottom. If your service includes windows, these are thoroughly washed as well. Caulk 3 and sealants are usually checked and may be cleaned if spills occurred.

Sometimes an external finish clean is also included. This involves cleaning the exteriors of windows, removing things like nails or debris from around the home, and making sure that all caulk 3 and paint is cleaned up and finished. If you only had interior work done, this phase may not be necessary.


POST-CONSTRUCTION CLEANING CHECKLIST

  1. Vacuum Carpets & Upholstery

It’s all too easy for dust and dirt particles to embed themselves in curtains, upholstered furniture and carpeted floors. If allowed to settle after construction, the result can not only look filthy, but also cause itchy, irritating reactions for friends, family or guests. Vacuum all soft surfaces, paying close attention to the details. Remove and vacuum each furniture cushion, and the underlying frames. Try vacuuming twice if you feel any residual dust after the first round.

  1. Wipe Down Hard Surfaces

Clean surfaces from the top down. Start by wiping the dust off your walls – yes, even your walls collect dust during construction. Dry dusting is the safest way to remove the particles without damaging a wall’s surface, but a damp cloth can also be used depending on your type of paint or wall covering. Refer to the paint or wallpaper manufacturer before using any moisture, and test a small area before proceeding. Moldings and cabinets are another favorite resting spot for dust particles. Take a duster to these areas next. Clean the interior shelves of all cabinets, paying special attention to those hard-to-reach corners. Wipe off countertops and any other flat surfaces before tackling the dirt and debris that’s on or near the floor. Then, sweep out any visible dust, and mop your hard floors from wall to wall.

  1. Clean Air Vents & Replace Filters

In a large home renovation project means, dust and debris will mingle with the air itself, making its way to your vents. Even if you only renovated one part of your home, treating the air vents and filters in that space is critical to reduce the amount of dust that can spread through the rest of your home. Remove the vent covers from the surrounding walls and ceilings, clean each one with soap and warm water, and let them dry thoroughly. Replace any exposed air filters with fresh ones before replacing the vent covers. Breathing dusty air can lead to allergies and respiratory issues, so remember not to skip this step!

  1. Don’t Forget About the Little Things

Clean any other furniture or items in the renovation zone for a fully dust-free living space. Here’s a quick list of commonly overlooked areas:

  • Ceiling fan blades
  • Light fixtures
  • Lamp shades
  • Electronics
  • Small appliances
  • Decorative items


Tips on Post Construction Cleaning

  • Dealing with all of the contractor leftovers

What a mess. It looks impossible, doesn’t it? The first step is a serious session of trash patrol. There is lumber, drywall, and garbage everywhere. Take a walk around and notice both the interior and exterior areas. Keep your eyes open for plastic tarps, tape, drop cloths and construction supplies like nails, screws, staples, bolts, etc. The crews aren’t trying to make your life difficult by making a huge mess, but still, be prepared to pick up a lot of trash and debris during this first step of post construction cleaning.

  • Hard floors – making them presentable again with post construction cleaning

Inspect the floors. You’re going to be appalled, but don’t worry. It can be cleaned. All construction work is messy and the flooring seems to always take the brunt of the mess. Check them for any damage, then start mopping, waxing, polishing and buffing. If you should run across any wood damage, get back with the contractor and ask for it to be repaired.

  • Rescuing your carpets from traffic, dirt, and grime

Carpet fibers will trap all of the fine wooden splinters and all of the dust. That’s not to mention the smell. You will need to use an industrial shop vacuum to get the grounded dirt and other objects out. After a good vacuum, shampooing will be in order. Steam cleaning might even be necessary. Be sure and allow for all the treated carpets to thoroughly dry before they are reopened to any foot traffic.

  • Walls and baseboards

The walls and baseboards are going to get hit and scratched during construction. There’s no way to avoid it. Crews use heavy tools and equipment that can cause minor dents, dings, and bruises. Check for this kind of unavoidable damage. It will need to be patched and repainted. Once you have addressed these concerns, clean the walls completely and give the baseboards a cleaning with a dishwasher detergent and water mixture. Use a Magic Eraser pencil for wooden surface scars.

  • Windows and mirrors

Neither you or your customers want to look at dirty windows. Dingy windows and mirrors look awful and it’s terrible for business. To restore window glass and mirror shine, use a heavy-duty glass cleaning product. Begin at the top and work down, and then be ready to rinse. You will probably have to repeat this process several times. For a great finish, let your last step be with dry cloth and polish.

  • Lighting – getting the shine back

You will start to wonder how the powdery dust got on everything. The lights and bulbs will be filthy. The dust film will actually reduce efficiency and produce an unpleasant smell. Be sure to turn off the electricity before cleaning light bulbs with a dry, soft cloth.

  • Cabinets, drawers, and closets

It’s so easy to overlook closets and drawers because they are closed most of the time. But you better believe the construction mess is in there too. And whatever you have stored is going to be dirty now, as well. Inspect all of your closets, cabinets, and drawers – and use a flashlight. Be prepared to clean the floors, walls and synthetic materials.

  • HVAC and interior systems

The HVAC system in your home is designed to pick up dust and dirt that is airborne. Construction activity certainly has caused a lot of that, and your HVAC is working overtime to keep up. Change the filters now. If your ductwork needs cleaned, hire it done professionally, as it is a big job. By hiring it done, you will get the entire HVAC tuned up and all registers and vents will be free of any impediments.

  • Sidewalks and driveways

What’s the old saying about “first impressions?” Your driveway, sidewalks, and entries are your guest’s first impression – whether it be your friends and family or customers and business associates. Make certain that your sidewalks are swept and you have gotten rid of any leftover building materials. Power wash the driveway and all exterior walkways. Dirt, sand, and gravel have accumulated throughout the project, and removing it will make a big difference.

  • Details and the final post construction cleaning touches

You’re getting close now. It’s finally time to put the final touches on this cleanup project. Polish the doorknobs, dust the window frames, outlets and switches, and vacuum all debris from sliding door tracks. Have a variety of sponges handy for this final stage. Let the fine tuning begin.


Why Your Should Hire Post Construction Cleaning After Your Home Project

  • They give your house or room a great first impression.
  • They make your home look clean.
  • They make your home inviting.
  • They give you a great piece of mind.
  • They make your home convenient to live in.