Tips To Make Commercial Electrical Remodel

How to Remodel a Kitchen On a Budget

Wondering how much a kitchen remodel costs? Get your fainting couch ready because, the average kitchen remodel costs a staggering $20,301 — roughly the same price as a brand-new Honda Civic. And a major kitchen remodel can cost over twice as much, with an average price tag of $50,000.

Putting down that much money on a new kitchen is worth it for some. But others aren’t interested in splurging on high-end updates. Luckily, putting your kitchen remodel on a budget doesn’t mean you have to sacrifice style.


Refresh Rather Than Replace Cabinets to Save Money

New kitchen cabinets are invariably expensive and contrary to the entire notion of a budget kitchen remodel. In general, all tear-out-and-replace projects are much more expensive than projects that keep a majority of the materials, and cabinetry is a prime example.  It is also more eco-friendly to avoid landfilling tons of flooring, glass, laminates, plastics, and other materials that take centuries to degrade. There are several good options that won’t require new kitchen cabinetry:

  • Painting your kitchen cabinets is the classic method of refreshing the outside shell of your cabinets.
  • More expensive than painting, kitchen cabinet refacing adds a new wood or thermofoil veneer to the outside of the cabinets and entirely replaces doors and drawer fronts.
  • If you are replacing your cabinets, think outside the box. Cabinets are usually less expensive when they are partially constructed from MDF.
  • If you don’t mind putting together your cabinets, you can look for RTA (ready to assemble) kitchen cabinets.

One way to limit the use of expensive wall cabinets is to install some open shelving. Result: an airy feel, almost like that of a commercial kitchen.


Use DIY Kits to Update the Lighting

One of the easiest and most affordable ways to update your kitchen is to use a recessed lighting conversion kit — no electrician required.

The kits only cost $15-$20 each and are a cinch to install, even for DIY newbies. The parts screw right into the recessed light, a brace holds the new light fixture in place, and a decorative cover hides the recessed light.

In about 15 minutes, you’ve got dramatic new kitchen lighting.


Flooring

New flooring for a mid-range kitchen typically costs $1,800 to $2,800. Here, again, the price varies depending on the material you use. Sheet vinyl can cost as little as $1,000, while hardwood – a popular choice for modern kitchens – costs around $4,000.

If your budget won’t stretch this far, here are a few cheaper flooring options to consider:

  • Just Clean Sometimes, a good cleaning is all it takes to get old tile floors looking like new. If yours is so filthy that mopping it no longer has an impact, you can have it professionally cleaned for around $450.
  • Look Underneath. If your kitchen has hideous old vinyl flooring, it could be worth peeling it up and having a look at what’s underneath. Sometimes, buried under the layers of cruddy vinyl, you can find perfectly good hardwood floors that only need to be refinished. That’s a job you can have done for around $600.
  • Use Peel-and-Stick Peel-and-stick vinyl tiles are easier to work with than sheet vinyl, so installing them is a fairly easy DIY job. If your floors are reasonably undamaged, you can apply the new tiles directly over the old flooring. You can buy peel-and-stick tiles at home centers for around $1 a square foot.

Paint the Floor. Believe it or not, it is possible to paint over old vinyl flooring. Clean the floor well, and scuff it lightly with sandpaper. Then roll on a coat of primer and paint it with tough “porch and floor” paint. Optionally, you can add a coat or two of water-based polyurethane to protect it. You can choose your own color and add patterns like stripes, checks, or stenciled designs. You can transform an entire floor this way for about $100.


Outdoor Kitchen Designs for Ideas and Inspiration

Outdoor kitchens typically include a prep and cooking area, some storage, and either a bar or dining table seating. These elements are a good start for the budget-conscious because they don’t require utilities like gas, electric or plumbing.

Outdoor kitchens can get expensive, and there are a few elements that may push your budget over the edge. Adding anything that requires a contractor or professional, like electrical or plumbing, will add up quickly. Avoid this by positioning your outdoor kitchen near an entrance or in close proximity to a water hose for easy access to kitchenware and cleanup. Opt for a propane tank or charcoal rather than installing gas lines to your grill or cooktop. And look for items that are portable so you can take them with you if you decide to move

Use Post Construction Cleaning For Your New Office

Post Construction Cleaning For Your New Home Or Office

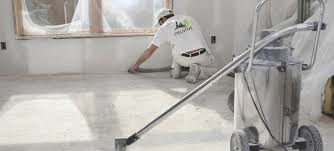
Professional cleaners could use their staff of washing authorities and state-of-the-art cleaning gear to clean up the dust, soil and dirt off the conclusion rapidly prior to the furniture and furnishings could be used or installed. The surfaces would have to be washed before painting as the clear presence of dust or muck would not let the most effective paint to keep for long. The floors would have to be washed and refined ahead of the carpets can be laid. The windows would need to be washed ahead of the curtains may be set up. The ceilings would need to be wiped before decorative lightings can be installed.

If you should be searching for Post structure washing, contact any skilled solution who will help you out in handling the task. They are empowered with teams of washing authorities and modern gear that can effectively conduct the cleaning task. Qualified post construction washing authorities totally clear the creating when contractors or renovators leave the premises. They offer cleanup solutions like cleaning up surfaces, removing dirt, discarding dust and remaining components. You can just curl up after employing an expert solution who can do it all for you.


Post Construction Cleaning Process

Just as no two construction jobs are the same, no two cleaning jobs are either. Therefore, most services change their process to best meet your needs. However, there are generally some guidelines that they follow.

This may include a rough clean, which takes place during the construction before the finish work is complete. This can include cleaning plywood 2 or concrete floors prior to the new flooring going down or scrubbing walls and preparing surfaces. Some rough cleans also are done at the end of construction and involve the removal of any trash, debris, or hazardous substances. Not every construction clean needs a rough clean, but many do to some degree.

The interior finish clean is next and, generally, involves cleaning all surfaces in and around the construction zone. This includes vacuuming and dusting all surfaces, such as baseboards, the interiors and tops of cabinets, and furnishings. Bathrooms, countertops, and cabinets are all cleaned from top to bottom. If your service includes windows, these are thoroughly washed as well. Caulk 3 and sealants are usually checked and may be cleaned if spills occurred.

Sometimes an external finish clean is also included. This involves cleaning the exteriors of windows, removing things like nails or debris from around the home, and making sure that all caulk 3 and paint is cleaned up and finished. If you only had interior work done, this phase may not be necessary.


POST-CONSTRUCTION CLEANING CHECKLIST

  1. Vacuum Carpets & Upholstery

It’s all too easy for dust and dirt particles to embed themselves in curtains, upholstered furniture and carpeted floors. If allowed to settle after construction, the result can not only look filthy, but also cause itchy, irritating reactions for friends, family or guests. Vacuum all soft surfaces, paying close attention to the details. Remove and vacuum each furniture cushion, and the underlying frames. Try vacuuming twice if you feel any residual dust after the first round.

  1. Wipe Down Hard Surfaces

Clean surfaces from the top down. Start by wiping the dust off your walls – yes, even your walls collect dust during construction. Dry dusting is the safest way to remove the particles without damaging a wall’s surface, but a damp cloth can also be used depending on your type of paint or wall covering. Refer to the paint or wallpaper manufacturer before using any moisture, and test a small area before proceeding. Moldings and cabinets are another favorite resting spot for dust particles. Take a duster to these areas next. Clean the interior shelves of all cabinets, paying special attention to those hard-to-reach corners. Wipe off countertops and any other flat surfaces before tackling the dirt and debris that’s on or near the floor. Then, sweep out any visible dust, and mop your hard floors from wall to wall.

  1. Clean Air Vents & Replace Filters

In a large home renovation project means, dust and debris will mingle with the air itself, making its way to your vents. Even if you only renovated one part of your home, treating the air vents and filters in that space is critical to reduce the amount of dust that can spread through the rest of your home. Remove the vent covers from the surrounding walls and ceilings, clean each one with soap and warm water, and let them dry thoroughly. Replace any exposed air filters with fresh ones before replacing the vent covers. Breathing dusty air can lead to allergies and respiratory issues, so remember not to skip this step!

  1. Don’t Forget About the Little Things

Clean any other furniture or items in the renovation zone for a fully dust-free living space. Here’s a quick list of commonly overlooked areas:

  • Ceiling fan blades
  • Light fixtures
  • Lamp shades
  • Electronics
  • Small appliances
  • Decorative items


Tips on Post Construction Cleaning

  • Dealing with all of the contractor leftovers

What a mess. It looks impossible, doesn’t it? The first step is a serious session of trash patrol. There is lumber, drywall, and garbage everywhere. Take a walk around and notice both the interior and exterior areas. Keep your eyes open for plastic tarps, tape, drop cloths and construction supplies like nails, screws, staples, bolts, etc. The crews aren’t trying to make your life difficult by making a huge mess, but still, be prepared to pick up a lot of trash and debris during this first step of post construction cleaning.

  • Hard floors – making them presentable again with post construction cleaning

Inspect the floors. You’re going to be appalled, but don’t worry. It can be cleaned. All construction work is messy and the flooring seems to always take the brunt of the mess. Check them for any damage, then start mopping, waxing, polishing and buffing. If you should run across any wood damage, get back with the contractor and ask for it to be repaired.

  • Rescuing your carpets from traffic, dirt, and grime

Carpet fibers will trap all of the fine wooden splinters and all of the dust. That’s not to mention the smell. You will need to use an industrial shop vacuum to get the grounded dirt and other objects out. After a good vacuum, shampooing will be in order. Steam cleaning might even be necessary. Be sure and allow for all the treated carpets to thoroughly dry before they are reopened to any foot traffic.

  • Walls and baseboards

The walls and baseboards are going to get hit and scratched during construction. There’s no way to avoid it. Crews use heavy tools and equipment that can cause minor dents, dings, and bruises. Check for this kind of unavoidable damage. It will need to be patched and repainted. Once you have addressed these concerns, clean the walls completely and give the baseboards a cleaning with a dishwasher detergent and water mixture. Use a Magic Eraser pencil for wooden surface scars.

  • Windows and mirrors

Neither you or your customers want to look at dirty windows. Dingy windows and mirrors look awful and it’s terrible for business. To restore window glass and mirror shine, use a heavy-duty glass cleaning product. Begin at the top and work down, and then be ready to rinse. You will probably have to repeat this process several times. For a great finish, let your last step be with dry cloth and polish.

  • Lighting – getting the shine back

You will start to wonder how the powdery dust got on everything. The lights and bulbs will be filthy. The dust film will actually reduce efficiency and produce an unpleasant smell. Be sure to turn off the electricity before cleaning light bulbs with a dry, soft cloth.

  • Cabinets, drawers, and closets

It’s so easy to overlook closets and drawers because they are closed most of the time. But you better believe the construction mess is in there too. And whatever you have stored is going to be dirty now, as well. Inspect all of your closets, cabinets, and drawers – and use a flashlight. Be prepared to clean the floors, walls and synthetic materials.

  • HVAC and interior systems

The HVAC system in your home is designed to pick up dust and dirt that is airborne. Construction activity certainly has caused a lot of that, and your HVAC is working overtime to keep up. Change the filters now. If your ductwork needs cleaned, hire it done professionally, as it is a big job. By hiring it done, you will get the entire HVAC tuned up and all registers and vents will be free of any impediments.

  • Sidewalks and driveways

What’s the old saying about “first impressions?” Your driveway, sidewalks, and entries are your guest’s first impression – whether it be your friends and family or customers and business associates. Make certain that your sidewalks are swept and you have gotten rid of any leftover building materials. Power wash the driveway and all exterior walkways. Dirt, sand, and gravel have accumulated throughout the project, and removing it will make a big difference.

  • Details and the final post construction cleaning touches

You’re getting close now. It’s finally time to put the final touches on this cleanup project. Polish the doorknobs, dust the window frames, outlets and switches, and vacuum all debris from sliding door tracks. Have a variety of sponges handy for this final stage. Let the fine tuning begin.


Why Your Should Hire Post Construction Cleaning After Your Home Project

  • They give your house or room a great first impression.
  • They make your home look clean.
  • They make your home inviting.
  • They give you a great piece of mind.
  • They make your home convenient to live in.

Use The Best Payroll Service For Your Company

Important Things a Payroll Service Should Do For Your Company

Make running payroll a breeze

The right service should do everything they can to help reduce the stress and hassle of running payroll by helping you to:

Centralize your record keeping so you’re not maintaining employee data in separate systems

Minimize the amount of data you need to enter to ensure greater accuracy

Ensure you never over-contribute and are confident employee cost-sharing programs are always on target

Eliminate all of your reconciliation headaches

Give you warnings on potential errors before you finalize payroll

Save time

Your time is valuable, and that means you should be able to save time and pay your employees faster. That means your payroll service should help you to:

Settle payroll discrepancies swiftly with your employees

Create time-saving formulas to handle commissions, benefits deductions, bonuses and RRSP matching

Automate your T4s, remittances, and ROEs

Integrate seamlessly with other mission-critical applications, including HR, benefits, and time and attendance, so any change you make to employee data is reflected instantly everywhere with no extra effort on your part

Reduce your risk

Another reason for choosing a payroll service is to reduce your overall risk. Your provider should make it easy to:

Accurately calculate, file, and pay payroll taxes

Ensure you are always remitting taxes accurately and on time according to federal and provincial laws

Align with employment standards with 100% compliance for vacation, overtime, and statutory holiday pay

Get a clear picture of your business

Your payroll solution should provide you with a high degree of visibility into your business. That means you should be able to:

Access unlimited payroll reporting whenever you need it to help you better understand your results, inform better practices, and forecast more effectively

Create your own detailed reports that help you dig deep into your data to uncover actionable insights (including both your financial and people data)

Easily export your payroll results into your workforce management system or other mission-critical systems


Tips for Choosing a Payroll Service

Ease of Use and Accessibility:

Most payroll services today allow access to a secure site for employees to view their individual payroll history. Having a password-protected website to view and print pay stubs, review payroll history and keep track of sick, personal and vacation days provides a better service for your employees. Having this information at their fingertips will also decrease the number of payroll questions you have to answer.

A web-based payroll system, though commonplace, is not the only way you can provide the information for payroll. Some payroll services require phone-ins at a specific date and time which can be very inconvenient for the ever-changing schedule. There is also the option to fax or e-mail. But being able to enter information anytime, anywhere from a web browser gives you an opportunity to double-check that all the information is correct and easily make adjustments. Once you determine which medium of communication works best for you, find out whether the provider can accommodate those needs. Providing information for the payroll service should not be complex and a hassle but easy and convenient. Remember a payroll service is supposed to alleviate stress.

Responsibility and Customer Service:

A payroll service that is frequently making mistakes can be the source of great frustration. And although you should only sign with a provider that guarantees they will absorb the costs of their mistakes, you do not want to worry about whose check will be incorrect next payday. As mentioned previously you should ask each payroll service for references from similar accounts. Check with these companies the accuracy, integrity, response time, professionalism and customer service of the provider.

Everyone makes mistakes; even the best payroll services can make a mistake at some point in time. What defines the company is how they react to their error and whether or not responsibility is taken. Ask them how quickly new checks will be provided if a mistake is made. And make sure the payroll service is liable for tax mistakes since the penalties for such a mistake can be very steep.

Customer service is also key. You do not want to hold for 20 minutes on the phone only to reach someone unfamiliar with your account and therefore unable to answer your question. Find out if there are other options besides calling to receive help or answers. Perhaps they can respond sooner to e-mails?

Who Will Handle Your Account?

Last but certainly not least is to find out who will be handling your account. You may have met with the experienced head honcho as you signed the dotted line but once you leave he assigns your account to an inexperienced intern. Once you find out who will be in charge of your account make sure it is someone you feel comfortable with, and someone who encourages you to ask questions. You will be dealing with this individual on a regular basis and you do not want to work with someone who makes you feel uncomfortable every time you do not understand something.


How to Choose a Payroll Service

How to Choose a Payroll Service: Where to Look

A simple Google search of “payroll service” yields about 485,000 results, and with so many options to choose from, narrowing down those results can be just as difficult as crunching numbers yourself.

Adam Spiegel, a certified public accountant and partner with Morrison, Brown, Argiz & Farra LLP, says getting a referral from someone you trust is the smart way to start your search. “You’ve got to discuss what you’re doing with a controller, a CFO, an outside CPA or an attorney who can advise you,” he says.

You might also try getting references from other similar businesses in your area. Pat Carson, founder of the San Jose-based bookkeeping and accounting firm Carson & Crew, says, “There will be folks who absolutely love the service they have and would be very willing to recommend people.”

The larger services Carson suggests are Intuit Online Payroll, ADP and Paychex, but, she warns, it’s important to realize that some large services may try to bundle your payroll package with additional services that you might not need, like human resources capabilities. This could drive up your monthly costs.

To make sure you’re not getting over-served, Carson suggests mapping out a list of services you expect your company will use over the course of a year. Ask yourself questions like how much you plan on growing, how many full-time, part-time and contract employees you’ll have on your payroll throughout the year, and if anyone is due for a raise or bonus. Decide whether or not you’ll need a company that can handle different state and federal taxes. Do you need human resources services in addition to payroll? How much can you afford to pay the service? Will you be offering employees 401(k)s and other deductions? How often do you want to issue paychecks?


How to do Payroll Taxes and Process Payroll Yourself

How to Process Payroll Yourself

Summary: Low cost but time consuming and prone to errors.

If you’re tax savvy, you may be able to take on a DIY approach to paying your employees. But given all the payroll mistakes you can make (and nasty fines you can incur as a result), make sure you’re completely comfortable with everything you need to do before you dive in.

To get started:

Step 1: Have all employees complete a W-4. To get paid, employees need to complete Form W-4 to document their filing status and keep track of personal allowances. The more allowances or dependents workers have, the less payroll taxes are taken out of their paychecks each pay period. For each new employee you hire, you need to file a new hire report. Note that there is a new version of the Form W-4 for 2020, so this is the form you should have new hires fill out starting January 1, 2020.

Step 2: Find or sign up for Employer Identification Numbers. Before you do payroll yourself, make sure you have your Employer Identification Number (EIN) ready. An EIN is kind of like an SSN for your business and is used by the IRS to identify a business entity and anyone else who pays employees. If you don’t have one, you can apply for an EIN through Square using our free EIN assistant. You may also need to get a state EIN number; check your state’s employer resources for more details.


Tips for Successful Payroll Management Services

Implement A Paperless Payroll Process

The first and foremost rule is to opt for paperless payroll management services.

By eliminating paper processing, payroll companies can save time as well as resources. The cost of issuing one paper check is estimated at $3. So if you are looking for ways to cut costs and at the same time, maintain the security of company data, then going paperless is the best way to achieve that.

Install The Right Software

With the advent of technology, you can now easily automate most of your payroll management services. Managing payroll has become easier than ever.

However, the trick lies in selecting and installing the right software suited for your business. There are many types of software available in the market — you can either choose directly from the shelf or have bespoke software developed as per your business needs.

Align Your Different Pay Schedules

When you are looking to effectively manage your payroll processes, it’s essential to stay organized.

Many companies maintain a different pay schedule, mainly weekly, biweekly, semi-monthly, and monthly. You can even pay more frequently if you desire. But in practice, it leads to more errors and increases the likelihood of duplication of multiple processes.

Get Proper Training in Payroll Management Services

The process of payroll management is constantly evolving, and you might especially see a variety of changes in federal and state laws.

Streamline Your Payroll System With Other Existing Systems

The first rule of buying a payroll software is to check whether it will be compatible with your already existing systems. If not, then it can create several problems for you.

For starters, the payroll system must integrate with your accounting system. It makes it easy to calculate and process the payments accurately.HR professionals need to continually educate themselves on the critical aspects of their role. They need to stay up-to-date with the technology progresses, demands on the HR department shifts, and several other related services.

Laminate Flooring Suite To Exclusive House

Hardwood vs. Laminate Wood Flooring

When deciding between hardwood vs. laminate flooring, there are several pros and cons to consider. Sure, when comparing laminate vs hardwood cost, laminate is usually the more affordable option. But you also must look at durability, resale value, cleaning, installation and more. This article will compare some of the factors between hardwood vs laminate flooring and help you decide which is best for your home.

Laminate vs. hardwood cost

The reality of flooring costs and what you can afford may be miles apart. Take into consideration the cost of laminate and hardwood flooring to determine what is best for you.

Hardwood: CONS – Hardwood flooring is made of harvested trees; pricing depends on the type of wood you choose. In general, hardwood is considerably higher to buy and to install.

Laminate: PROS – Laminate wood flooring is made from composite wood pressed together at high temperatures. The image of hardwood is then placed over the composite wood, covering it to form the laminate. Not only are the materials themselves cheaper, but laminate wood installation cost is, on average, 50 percent less than hardwood installation.

Laminate flooring can cost $3-$7 per square foot, including installation. Solid wood flooring can cost $5-$10 per square foot, including installation. Again, the exact prices will vary depending on the types of materials used and the size of your home.

Laminate vs. hardwood durability

Assess the traffic load and wear and tear on flooring in your home. A more durable surface is easier to maintain and will look great for years to come.

Hardwood: CONS – Hardwood is susceptible to scratching, can get damaged from excessive moisture and will show wear, especially in heavily trafficked areas. PROS – Hardwood is the real deal; it is gorgeous and, depending on the type of wood, can add considerable value to your home.

Laminate: PROS – Since laminate is made from pressed wood, it is more durable and resists scratches, moisture and wear and tear. Laminate flooring is also easier to clean. CONS – Even though laminate is more durable, it is not as visually appealing. Lower qualities of laminate may have artificial-looking wood grain textures.

Laminate vs. hardwood repair

Your home’s flooring will typically need repairs at some point. From minor accidents to excessive wear and tear, laminate and hardwood have advantages and disadvantages.

Hardwood: PROS – Hardwood can be repaired by sanding imperfections and refinishing. This gives it the edge over laminate, in that it will last for years.

Laminate: CONS – Laminate flooring doesn’t repair easily. If you buy flooring that comes in individual pieces and snaps together, you may be able to replace individual boards — although, depending on sunlight and age, the new piece may not match properly.

Best places for hardwood vs. laminate flooring

In addition to price, durability and repair, you should also consider the best (and worst) places in the home for both types of flooring.

Hardwood: Hardwood flooring is both beautiful and fairly durable, especially in lower-traffic rooms like bedrooms and dining rooms. But, if you have pets or a lot of foot traffic, your hardwood floors might show the scratches and wear overtime. Basements and bathrooms with a lot of moisture are also not good places for hardwood flooring. On the other hand, continuous sunlight can fade your hardwood flooring overtime as well.

Laminate: Because laminate flooring is so durable, it’s less susceptible to wear and tear from pets and foot traffic. While it withstands moisture better than hardwood, it should not be in a regularly wet area of the home. Because of its top coat, laminate flooring typically does not fade from sunlight as quickly and noticeably as hardwood flooring and can be used safely in rooms with large windows.

Your home will benefit from the look of wood flooring; deciding between hardwood vs. laminate flooring is up to you. Review the pros and cons, and be realistic about your lifestyle; if you have pets, young kids or high traffic, that may influence your decision.

If you have a lot of sunlight in your home, hardwood can fade because it is a natural product, while laminate wood flooring has UV protection integrated into the surface. Consider all the factors — and enjoy how the warmth of wood will improve your home’s aesthetic appeal and value.


Durability Vinyl Plank vs Laminate Flooring

Consumers often turn to vinyl plank or laminate flooring to get the look of hardwoods without the risk of scratches, dings, and other flaws that can be time-consuming (and expensive) to repair. One of the primary benefits touted by both vinyl plank and laminate flooring is durability. How do these two types of flooring hold up when put to the test?

Vinyl plank (LVP) holds up well under pressure. Unlike hardwoods, it isn’t prone to scratching from animal claws or active children running through the house. It’s very durable, even with the heaviest traffic.

However, because vinyl plank is softer than hardwoods or laminate, it isn’t completely immune to damage. There is a risk of ripping the plank. For example, if you’re dragging furniture across the floor, planks can be torn.

Vinyl flooring is prone to damage that harder floors can withstand. It can dent over time, particularly in areas under heavy furniture. While it is quite durable, it’s important for anyone planning to purchase this type of flooring to know it’s not completely immune to damage and is vulnerable to the same flaws as traditional vinyl flooring.

Laminate flooring, like vinyl plank, is also extremely durable and is a good choice for homes with children and pets. It is extremely resistant to damage and will not have to be refinished over time like traditional hardwoods.

However, it is possible to scratch or chip laminate flooring. Very heavy wear over the years can result in minor scratches on the flooring. Luckily, laminate repair kits are available online and at home improvement stores to improve the appearance of chips and scratches.

Laminate flooring is superior in terms of fading. While laminate can fade when exposed to sunlight over long periods of time, it is more resistant than vinyl flooring. With both types of flooring, shades or blinds should be used in rooms with a lot of sunlight, and area rugs can also be used in brighter spots that may be more apt to fade.


How Long Will Laminate Flooring Last?

When choosing laminate flooring, you need to consider wear ratings along with price and style. In laminate flooring, a wear rating is an indicator of how well the floor will stand up to daily wear and tear. Modern laminate floors are attractive, versatile and durable, but they can be scratched or gouged. All laminate flooring has a wear rating denoted by an AC, “Abrasion Class,” followed by a number. There are five AC ratings for laminate floors, ranging from AC1 for low-traffic areas to AC5, meant for commercial use.

AC Ratings

Abrasion Class (AC) Ratings are broken down into five levels, labeled AC1 through AC5. Levels AC4 and AC5 are appropriate for commercial use, while AC1 through AC3 are residential. The AC Ratings are as follows: AC1 is for home use with minimal traffic, like bedrooms or closets. AC2 is suitable for moderate-traffic home use like living rooms and dining rooms. AC3 is best for higher traffic and heavy-use residential areas like kitchens or laundry rooms, and can be used in light commercial applications like small offices or hotel rooms. AC4 is designed for light commercial use like small shops, and AC5 is the heaviest rating, used in larger commercial settings.

Layers of Laminate

Wear ratings denote the durability of the wear layer. Laminate floors are made in layers, and the wear layer is typically filled with aluminum oxide, or sometimes melamine, and it’s what helps the floor stand up to daily use. The wear layer is also what prevents fading and makes the floor easy to clean and stain resistant. The decor layer is the printed image that recreates the look of natural stone, wood or tile. The core layer is really the foundation, creating structure and dent resistance, while the backer layer adds additional support and stability.

The Wear Layer

The wear layer is the top layer of the laminate floor; it’s what chairs get dragged over and people walk on and drop things on. It’s what takes the “wear” of life. Higher wear ratings translate to a longer life for your laminate floor and a higher price tag than lower wear ratings. Each rating number represents a 60% increase in wear over the previous one: AC2 is 60% heavier wear than AC1, for example, while AC3 is 120% heavier wear than AC1. Higher wear ratings can cause a slightly cloudy look from a thicker layer of aluminum oxide, which can dull the appearance of the decor layer.

Choose Your Rating

Lower AC ratings may be less expensive, but it’s a good idea to look at lifetime use. How long a floor will last depends on many factors, including level and type of traffic and how it’s maintained. In a household with pets or small children, a higher AC rating will provide longer floor life, while a room that gets little use would be fine with a lower rating. Manufacturer’s warranties start at 10 to 15 years, and many go as high as 25 or 30 years for higher wear ratings. When choosing the right wear rating, look at budget as well as lifestyle and budget for repairs and replacement down the road before deciding what’s right for you.

Expected Lifespan

The average lifespan for laminate flooring is between 15 and 25 years, but it can vary from as short as 10 years to as long as 30 years. The difference in life expectancy depends on the quality of the flooring, whether it was properly installed and the amount of traffic it receives. Improper maintenance, such as using harsh cleaners or failing to wipe up spills, can reduce the floor’s longevity. Laminate flooring does not last as long as hardwood flooring, which can have a lifespan of around 75 years if properly maintained. It also cannot be sanded and refinished like wood. Once the top layer wears away, it must be replaced.


Is Thick Laminate Flooring Better Compared to Thinner Laminate Flooring?

Benefits of Thick Laminate Flooring

One of the benefits of thicker laminate is its higher sound dampening performance. This is simply because it contains more of the high density fiber (HDF) core and provides less sound transference through the plank. Thicker laminate will definitely offer more stability and strength, so if a little extra cost is not an issue, thicker laminate is definitely worth it. It’s also the better option if your subfloor isn’t as sturdy, such as an old creaking wood subfloor. The 12mm laminate flooring will provide you with a more sturdy feel when walking upon it.

Benefits of Thin Laminate Flooring

6mm thick floors are ideal for a budget projects, however we suggest to install 6mm laminate flooring over flat cement floors. This way you don’t have to worry about the stability of the locking system since the subfloor provides stable support to allow the laminate to float.

A good quality, flat and smooth subfloor is a key when installing thinner laminate flooring. You need a very stable subfloor in order to allow your thinner laminate floor to perform as expected. The price of the thinner laminate flooring is a definitive advantage since it is normally priced lower compared to thicker laminate.


Tips to determine the quality of laminate floors

  • Inquire about the grade of the product: Quality wise laminate floorings are graded in good, better and the best, three categories. The cost of these floorings rises with the rise in grade. But if you have a restricted budget then you should consider some other factors to find good flooring for you.
  • Check the finish of the floor: The alignment of the floor should be even. There should be no gaps or unevenness while installing at your floor. The laminate floorings of good quality should provide a seamlessly flat surface.
  • Check the patterns: If the patterns on the laminate floor do not give a smooth and natural look then it is a low quality floor. The repetition of patterns degrades the quality of the flooring.
  • Ask about the making process of the flooring: Laminate floorings are made by direct as well as high pressure methods. Though both the methods provide good laminate floorings but the floorings made from the latest technique of high pressure have higher quality than others.
  • Confirm about ISO rating and UV compatibility of the product: ISO ratings and UV compatibility are the mark of good quality and durability of the laminate floor. It will last for long time without losing its sheen.

Do Drywall Repairs To Make Better Wall

10 Tips for Patching Drywall

Before you paint a wall you have to prepare the surface, which inevitably involves patching. It’s one of the most important steps. But sometimes it takes more than just a can of spackling and a small putty knife to get good results. Here are some wall patching tips and products that will help you speed up the job, avoid problems and end up with a flawless wall.

1.Use Self-Priming Filler

Patches made with traditional patching materials need to be primed with a sealing-type primer before painting. Otherwise the patched areas could show through the finished paint job as foggy spots. But if you patch with a self-priming patching material, you can avoid this extra step. There are several brands; just look for the words ‘self-priming’ or ‘with primer’ on the container.

2.Use Setting Compound for Big Holes

It’s fine to fill screw holes and other small wall dings with patching compound, but for dime-size and larger drywall repairs, and for holes that are deep, it’s best to use a joint compound that sets up by a chemical reaction. These are available in powder form with setting times ranging from five to 90 minutes. The reaction starts when you mix in the water, and the compound hardens in the specified time. The five-minute version is nice because you can buy the powder in a convenient 5-lb. box, and the compound hardens quickly, so you can apply another coat right away. Remember, setting-type compounds are harder to sand than regular patching materials, so make sure to strike them off flush to the surface when you fill the hole. You’ll find setting-type compounds wherever drywall taping supplies are sold.

3.Make a Dent for the Patching Compound

When you remove a nail, drywall anchor or picture hanger, there is usually a little ridge of old paint or drywall sticking out that’s hard to cover with patching material. The solution is to make a dent over the hole, and then fill the dent. Most good-quality putty knives have a rounded hard plastic or brass end on the handle that works perfectly for making the dent. The rounded end of a screwdriver handle or the handle of a utility knife will also work. Press the handle against the hole and twist it slightly while applying pressure to dent the surface, or if you have good aim, use your denting tool like a hammer.

4.Cover Cracks with Repair Spray

Stress cracks usually show up around window and door openings. The cracks are the result of framing movement and are hard to fix permanently. But using spray-on crack repair is a good way to at least extend the life of your repair. The spray forms a flexible membrane over the crack that can stretch and relax as the building moves.

If the crack is open, fill it first with patching compound. Then follow the instructions on the can to cover the crack with the crack-repair spray. Let it dry and cover it with paint to finish the repair. You’ll find crack-repair spray at hardware stores, paint stores or online.

5.Fill a Row of Holes with One Swipe

Professional drywall tapers always fill a row of screw holes with one long stripe of joint compound, rather than filling every screw hole separately. In addition to being faster, this method disguises the screw holes better and makes it easier to sand the patch. Instead of sanding around each hole, you can just sand the whole stripe.

You can take advantage of this tip whenever you’re filling a series of holes that are lined up and close together, like the holes left from a shelf standard or a row of pictures. Use a 6-in.-wide putty knife and apply the compound as shown in the two photos.

6.Skim-Coat Areas with Lots of Dings or Holes

In areas with a lot of dents and holes, like in the mudroom where boots, hockey sticks and golf club bags leave their marks, don’t try to fill every dent individually. Instead get a wider taping knife—a 6-in.-wide putty knife will do—and simply skim the entire area with joint compound. For the best results, use ‘topping’ or ‘all-purpose’ joint compound.

Mix a tablespoon or two of water into three or four cups of the joint compound to make it easier to spread. Then put a few cups into a drywall pan and use your 6-in. knife to spread it. Spread a thin coat of joint compound over the area. Then scrape it off, leaving just enough to fill the recesses and holes. You may have to apply two or three coats to completely fill holes, but the thin layers dry quickly and are easy to apply. Sand the wall after the final coat dries.

7.Seal Exposed Drywall Paper Before Patching

When you peel off old adhesive or self-sticking picture hangers, you often tear off the top layer of drywall paper, leaving fuzzy brown paper exposed. If you try to patch over this without sealing it first, the water in the patching material will cause the paper to bubble and create an even bigger problem. The key to patching torn drywall paper is to seal it first with an oil- or shellac-based sealer (KILZ Original and BIN are two brands). These are available in spray cans or liquid that you can brush on. Don’t use a water-based product or you’ll likely have the same bubbling problem. After the sealer dries, sand the area lightly to remove the hardened paper fuzz. Then cover it with patching compound as you would for any other wall repair.

8.Use Stick-On Patches for Midsize Holes

There are all kinds of ways to patch doorknob-size holes. But the quickest and easiest is to use one of these stick-on mesh patches. They’re available in a few different sizes at paint stores, hardware stores and home centers. To use the patch, just clean the wall surface and sand it to give the surface a little ‘tooth.’ Then stick the patch over the hole and cover it with two or three thin layers of joint compound. You can speed up the process by using setting-type compound for the first coat.

9.You Can Spray on Wall Texture

Orange peel texture on walls or ceilings is nice for hiding defects and adding interest, but it can be a real pain if you have to make a big patch. Luckily you can buy spray-on orange peel patch that will allow you to match the texture of the patch without hiring a pro. You can buy the patching material in a few different versions: regular, quick-drying and pro. The pro version gives you the most control over the spray pattern.

Make sure to practice spraying the texture onto a scrap of drywall or cardboard to fine-tune your technique before you spray it on the wall patch. Let the test piece dry before you decide whether you need to adjust the nozzle for a coarser or finer texture. Remember, you can always add another coat if there’s not enough texture after the first coat dries.

10.Use a Raking Light When Patching Walls

When you’re preparing your walls for paint, position a bright light so that the beam rakes across the wall as shown here. This will accentuate any defects, making them easier to see and fix, and will alert you to patches that need more fill or additional sanding. If your walls look smooth in raking light, you can be sure they’ll look awesome when you’re done painting.
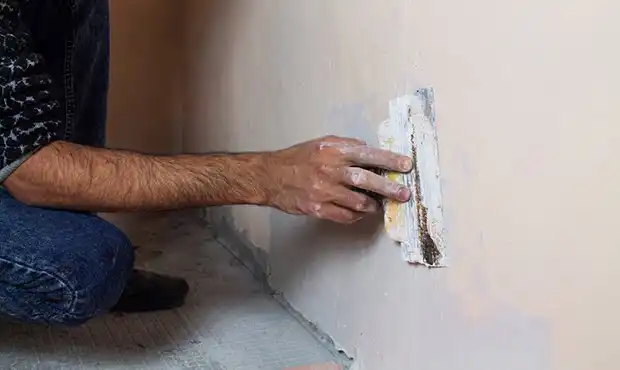
 

Here’s how to repair and patch damaged drywall

No matter the age of your home, drywall damage will occur. Whether it be from doorknobs, roughhousing, minor water damage, moving furniture or mounting hardware from artwork, mirrors, TV mounts, window treatments, etc., it will happen. Minor damage is a relatively easy fix. Small screw or nail holes can even be patched with white toothpaste and touch painted to blend in.

Repairs to areas of major water damage are best left to the pros. You never know what kind of damage is lurking behind that drywall. There could be mold and that is something that is best left to a professional mold remediation expert.

The age and condition of the paint on your wall and stored paint from when it was applied are really the key factors in how quickly you will finish drywall repair projects. But it’s the quality of the patch work that is critical to restoring drywall to look like new. The paint will only look as good as the surface it’s applied to. A poor patch with a poor texture match will stand out more than you’d expect, even with the best paint coating.

Nail holes in a wall where a picture used to hang can be filled with spackling paste, caulk or even toothpaste for an especially tiny hole; let it dry and sand it down before repainting.

For dents or holes larger than a quarter, drywall texture and drywall tape or mesh will be required to complete the project. Anything over a 2-inch square will require a scrap drywall piece to cut a filler piece along with the following tools:

Utility knife or drywall saw. Having both can come in handy, but you won’t need both if you only own or have access to one.

  • 12-inch straight edge.
  • A level.
  • 4-inch putty knife.
  • Coarse sponge or sandpaper.

Optional:

  • Acrylic caulk if the patch is matched up to another material/surface such as a countertop, shower, tile finish, etc.
  • Drywall pan if a large amount of mud will be required.
  • Texture spray for orange peel finishes.
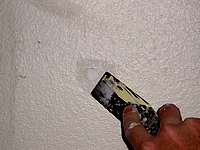
 

Pro Tip: How to Repair Torn Drywall Paper

So you finally got around to removing that paneling or tile and RIP! Off comes some drywall paper (also called facing) along with it. Now what started as a fun update project has turned into an annoying repair project. The damage isn’t deep, but it’s unsightly. So what’s the right way to repair it? Well, why don’t you ask us a hard question? We’ve tackled patching a hole in drywall, and this will be easier than that. How to repair torn drywall paper and patch it up is a Pro tip you’ll want in your back pocket.

Well That’s Not Tearable

  1. Remove loose paper with a razor knife.

You’ll surely have some ragged or hanging paper left from the tear, so use a razor or utility knife to remove it. The edges of the tear should be smooth against the wall.

  1. Important: seal the exposed gypsum. 

The gypsum will absorp moisture from latex paints, so you must seal it to prevent blisters. You can use some drywall primer and sealer or even old oil-based paint that you told yourself you’d use or throw out but haven’t done either.

  1. Cover the area with joint compound.

Use a putty knife to spread a thin layer of joint compound (mud) over the area. You’re not just filling the torn area, you are creating a new surface so the joint compound should extend an inch or so past the edges of the tear. Apply the mud as evenly as possible but you’ll find that it may look uneven or pock-marked, especially if you’ve never done this before. Not to worry – read on.

Last Steps: Repair Torn Drywall Paper

  1. Sand the area.

It’s common to use a fine sandpaper such as 120 grit to sand the area. For larger areas you can turn to a bigger tool like the Ridgid Gen 5X random orbit sander. We’ve even used a multi-tool with a sanding accessory. However, we prefer a wet sand before the joint compound has completely cured. A wet sand doesn’t create fine airborne particles or dust on floor, and it gently removes the area’s high spots and fills the low spots. The curing time depends on temperature and humidity, but we like to give the area around 45 minutes to harden up. Touch the compound to make sure it’s not so wet that it comes off on your fingers. It should be firm but pliable. Use a damp sponge to gently sand the area and create a smooth surface with the rest of the wall.

  1. Apply another layer of joint compound.

 What’s better than one layer? Two, of course. A second layer will likely be necessary to make the mud coverage wide and smooth enough to blend in. You’ll never notice the area once it’s painted if you do it correctly. You’ll likely want to repeat the sanding step as well.

  1. Paint.

Here’s where the evidence of the tear disappears. Paint the area, and enjoy that invisible repair.
 

Drywall Repair – A Common Problem In Every Home

A common problem in almost every home is drywall repair. Anytime we are indoors we are usually surrounded by drywall – a less than perfect building material. It’s fragile, is easily ruined by a bit of water and can be a magnet for mould. Yes, there are water-resistant varieties now, but drywall can still be miserable. Just think of the first time you tried hanging a picture before realizing it’s not that simple on drywall.

However, we have not come up with anything better. It’s been around for decades, having replaced plaster. Plaster had far worse drawbacks. Among them, it takes forever to dry and is much more labor-intensive to install.

Drywall was a great idea because it’s like applying plaster except most of the messy work is done in a factory, and it’s shipped to your home ready to install. Before you know it the job is done, and only later do you realize that you tackled one of the most dreaded jobs of home remodeling. Repairing drywall is even easier.

No matter how well drywall is hung and finished, eventually it will need repairs. Daily life brings about all sorts of wear and tear, like doorknobs creating small holes in walls. Even if every adult, child and pet is a perfect family member and each manages to not cause any damage, natural processes will still slowly take hold.

The rigid materials that give our houses their structure eventually start to shift due to natural expansion and contraction. Drywall will crack. There’s no need to be anxious. Even extensive drywall damage is fixable, even if it means replacing large pieces. Most drywall repairs require just basic skills, tools and drywall patching mud.


Joint Compound vs Spackle, Which One Should You Choose?

Joint compound and spackle are two fantastic products that are designed to help you fix the imperfections on the walls in your home. However, when faced with the decision of having to pick between the two, which one should you choose?

Although personal preference definitely plays a role, it really comes down to what you’ll be doing with it. Before we continue though, it’s important to have a good understanding of what joint compound and spackle are.

Joint compound, also called drywall compound, is a putty that has the consistency of plaster and is designed for larger jobs. Joint compound is made by mixing gypsum dust and water into a paste. It’s usually comes in a pre-mixed container for your convenience and is commonly used for taping and finishing drywall seams. There are 4 kinds of joint compounds on the market. They include:

  • All-purpose compound: Can be used for all phases of the patching process.
  • Topping compound: Made to be spread on a wall with two dried coats of taping compound.
  • Taping compound: The first and second coat of compound you want to put on.
  • Quick-setting compound: Made to dry faster than the other compounds and works great for deep cracks and wide holes.

Spackle on the other hand is a name brand product made by Muralo Company. It resembles paste and comes in lightweight spackle and heavy spackle.

Lighter Spackle is generally made from vinyl and used to smaller fill holes made by nails, pins, and needles. Heavier spackle is made from acrylic and typically used for larger, thicker holes.

Spackle also is sold in pre-mixed containers for easy use, but for those that are interested, powdered mixes are also available. To keep the powdered mixes from going bad, make sure you only mix enough for the job you’re about to do


Electrical Home Inspections Are Conducted Regularly For The Safety Of Your Home

ELECTRICAL HOME INSPECTION: WHAT YOU SHOULD KNOW

Whether you’re buying a home, or just moving in to your new home, here is some advice that can help you. If you’re in the buying process the things you will be looking for are safety and repair aspects. Most electrical contractors can offer you an inspection to check for both of these. If you are thinking to yourself right now that you have or are going to hire a Home inspector, think again. A home inspector does a generalized inspection. Most of them will know a little about a lot of different areas, but be an expert in none with a few exceptions. It is a certainty in most areas to say you will be forced to hire one to get a mortgage, and that’s a good thing. If you hire an experienced licensed electrician, your electrical inspection will be more thorough and you can get an estimate to what repairs will cost at the same time.

When buying a home you’ll want to know what if any defects there are, or safety hazards. Items that rate high on the list are things like aluminum wiring, GFCI receptacles, grounding and water leaking into service parts. The two of these that are most critical, dangerous and expensive are the aluminum wiring and water leaks into the main service. If you are just moving into a home you purchased, there are some things you can do to be sure your electrical system is safe. I highly recommend that all the devices be changed to new ones. This would be all the switches and receptacles. There is a reason for this. Most electrical problems occur when termination points become loose or corroded.

By having the devices professionally replaced, you can nip any of these problems before they occur. The other item to consider changing is light fixtures. This can be a bit expensive so if it isn’t in your budget try to at least change the very old ones. The reason for changing these is older fixture wires tend to get very brittle. If the bulbs used in them over the years were of an improper wattage, this can exaggerate the situation, a very common occurrence.

The peace of mind you will get, knowing a professional electrician in the electrical field inspected your home, is well worth the money spent.


When Do You Need to Get an Electrical Inspection

An electrical inspection will ensure your home or business’s wiring and other electrical components are in good working order and do not pose a hazard to yourself or your family.

A comprehensive electrical inspection may involve the following:

  • Determining any electrical hazards
  • Checking for uncovered permanent wiring
  • Checking for any exposed wires
  • Checking for outdated wiring
  • Testing safety switches
  • Examining the power box
  • Checking safety switches
  • Testing power points and lighting
  • Evaluating the level of electrical service
  • Assessing whether the home includes any DIY wiring
  • Noting the location of smoke alarms and testing them
  • Scanning for any electrical items that don’t comply with current government regulations

Knowing exactly when you need an electrical inspection done on your home can be tricky, which is why we’ve compiled a list of occasions where you may need an electrician to come and take a look at the electrical system in your home.

  • BEFORE YOU COMMIT TO BUYING A HOUSE
  • IF YOUR HOUSE IS OLD OR YOU HAVE ANY CONCERNS
  • IF THE HOUSE IS OVER 25 YEARS OLD.
  • IF YOU HAVE OLD WIRING.
  • IF ANY DIY WORK HAS BEEN CARRIED OUT.
  • AFTER A MAJOR STORM

Preparation before a storm

There are several precautions you can take to ensure that your house is prepared for a major storm:

  • Make sure safety switches are installed on all circuits in your switchboard and test them to ensure they are working properly.
  • Switch off and unplug all critical appliances that you don’t need to use.
  • Consider installing a surge protector to reduce electricity spike damage and help with general power surges, this will protect your appliances like those expensive televisions, A/C units and computers.
  • Steer clear of all electrical cables, lights, appliances, fixed wire phones or any conductive materials during a storm.

After a storm

Following a storm, you should take the following actions if your home has been affected by storm damage:

  • If your property has been flooded over power outlets, electrical wiring or any other electrical installations such as switchboards, organise a licensed electrician to check the premises as soon as the water subsides. Do not attempt to touch or unplug any appliances in the meantime.
  • If any electrical appliances were affected by water during the storm, have them checked by a licensed electrician before use.
  • If your electricity was disconnected during the flood, you will require a certificate of test from a licensed electrician before the Distribution Entity will reconnect the power.


9 Tips for Passing an Electrical Inspection

If you are considering attempting your own electrical work on your next project, I implore you to apply for electrical permits from your local government.

Applying to do my own work was a simple process.  In this case, all I did was fill out a couple of simple forms where I stated my name, address, the scope of the work being performed (adding 4 recessed lights) and the estimated cost of the work related to the permit.  After about two weeks, the township called me and let me know my permit was approved and ready for pickup.  I paid a $61 fee to the township and got started on the rough-in work.  Once I complete the rough-in work, I schedule the inspector and he pays me a visit.

The most anxiety inducing part of this process is the rough-in inspection, but if you follow these general guidelines, you’ll be much more likely to pass the first time.

  1. Ask the Inspector First. When you schedule the inspector, try to actually have a conversation with him or her about what they expect to see and what pitfalls you can avoid.  All inspectors should be looking for the same checks, but some have additional requirements or pet-peeves that can fail you.  Checking with them first is a great way to establish a name to a face and get a sense of their general requirements.
  2. Don’t Add Any Devices. During the rough-in inspection, there can’t be any devices on the circuits you are adding. No outlets, no lights, no switches, nada, nunca.  If you are adding an outlet to an existing circuit, then the NEW outlet should also not be installed either.  The rest of the outlets on that circuit that were originally there are probably fine, but if you disturbed the wiring in any outlet, it shouldn’t have a device for the inspection.
  3. Tie Your Grounds Together. In each outlet or electrical box location, the ground wires should be tied together.  This is something my inspector noted today.  Don’t tie anything else together though.  The hot and neutral leads should remain separate.
  4. Fire Block. Any holes or penetrations from one floor to the next or from one wiring passage to the next needs to be blocked so as to prevent a fire using the hole as a breathing hole or chimney.  Typically, you can use fire block expanding foam (which is bright orange in color) or regular fiberglass insulation to fill or plug these kind of holes.
  5. Plug Holes in Boxes. This one was new to me and I’ll have to fix it.  The electrical box I used have these bendable tabs where the cable enters.  Well one of these tabs snapped off.  The inspector told me I need to plug it.  I’ll probably use insulation and jam it in the hole here.
  6. Use Correct Breaker. Another correction I’ll have to make is the circuit breaker I installed.  The breaker in this application needs to be an 15 amp Arc Fault Circuit Interrupter (AFCI) and I had installed a regular 15 amp breaker.  The AFCI’s prevent arcs and are required on all circuits that feed living spaces (I think).  You can buy AFCI’s in any hardware store and they are several times more expensive than regular breakers.
  7. Don’t Power the Circuit. Although the wires for the new circuit can be tied into the new breaker, the breaker needs to remain off or unpowered.  It shouldn’t be powered up until all the devices are installed.
  8. Cover the Wires with Wire Nuts. All the wire ends need to have wire nuts on them even if they don’t have any exposed conductor.  Same goes for the ground wires.
  9. Secure Cables with Staples. Cable runs need to be secured to framing every so many feet with cable staples.

That’s pretty much all I have for the rough-in inspection.  If you have any others, please leave them in the comments.  If you’ve never done your own electrical work, then I suggest you work with someone more experienced before you attempt it yourself.  Be safe and good luck.


How often should you have an electrical check?

How often you should get an electrical check will depend on how old your house is and the number of appliances it supports. Older houses may have an outdated electrical system which can’t support certain appliances and increasing loads.

A periodic inspection involves conducting checks and associated testing to see if the electrical components of a house are working optimally. After the required inspection and testing, an Electrical Installation Condition Report will be issued. The report shows any observed defects, damages, unsafe conditions, and any non-compliance with current safety standards that could lead to danger.

It is often recommended to get an electrical check every 3-5years. You also need to update your electrical system, when necessary,to keep up with recent safety standards, even if you have a relatively new house.

To maintain adequate safety standards, periodic testing and inspection should be carried out as follows:

  • Every 5 years, at least, for businesses
  • Every 5 years, or during every change of occupancy, for tenanted properties
  • Every 10 years, at least, for private homes

You will know that your electrical system is inadequate when you start experiencing any of the following:

  • Fuses constantly blowing
  • Outlets and switches no longer working properly
  • Tripping circuit breakers
  • Your electrical outlets are two pronged instead of three pronged
  • Lights flicker when an air conditioner, heater, or some other appliance is turned on

Regular checks should be carried out around the house to monitor the condition of sockets, switches, cables, and other accessories.  Once anything unusual is noticed, such as circuit breakers tripping or fuses blowing, crackling or buzzing, or burn marks on sockets and plugs, a registered electrician should be contacted to conduct an electrical check immediately.Various factors can lead to the wear and tear of electrical installations, including how the property has been used and the materials that the installations are made of.

When an electrical check is done and it is discovered that a rewiring is needed, it is recommended to remove redundant wiring. To avoid any risks, all redundant wiring must be disconnected permanently from any electrical supply if it is not possible to have it removed. There are no set rules as to when a property should be rewired. Rewiring should not be done just because the wiring of a house is old. As long as it meets safety conditions and is in good shape.

For caravans and swimming pools, there should be more frequent periodic electrical inspection and testing as follows:

  • Every 1 year for swimming pools
  • Every 3 years for caravans


Failing a Home Inspection

The areas that cause the most trouble on a home inspection report are those that compromise the health and safety of people living in the home. Here are some examples of ways that a home could fail an inspection:

  1. Moisture in the Basement: Water intrusion is a possibility in most basements simply because they are below ground level. Water in the soil puts pressure on basement walls and since it follows the path of least resistance, will cause a wet basement over time. A damp basement can cause spalling in concrete, brick or stone and it can cause mold as well. Solutions range from redirecting gutters to installing a sump pump in the basement.
  2. HVAC Problems: HVAC systems are the source of many problems uncovered by home inspectors. For example, the home’s wiring may not be sufficient to handle the demands of the heating and cooling equipment, gas-fired furnaces may not have adequate exhaust systems in place. Other problems include cracked ductwork and flue pipes that have not been correctly installed.
  3. Roofing Problems: This is one of the more expensive problems to fix and is likely to be a deal breaker for potential buyers. As roofing materials age, they are more likely to break down causing leaks and water damage; furthermore, they tend to age more quickly if they are not correctly installed. For example, asphalt and wood shingles can cup or curl due to age.
  4. Moisture Problems in the Attic: Poor insulation, ventilation or vapour barriers can lead to moisture in the attic. Moisture in the attic can cause mold and mildew to grow. Solving the problem involves finding and fixing the source of the moisture.
  5. Electrical Issues: A home’s electrical service should meet current standards. Electrical problems inspectors often encounter include overfusing, which is the term used for a mismatch between the wire and the overcurrent protection. Overfused circuits can cause fires.
  6. Rotting Wood: Any wood used in the home’s construction can be affected by moisture and age. This includes your wooden decks and door frames. Inspectors will check wood surfaces in the home for rot.
  7. Security Issues: This is not about your security system; this part of an inspection involves checking out your more basic safety features. An inspector will look for proper window and door locks as well as smoke and carbon monoxide detectors.
  8. Problems with the Structure and/or Foundation: One of the basic facts of construction is the fact that a stable foundation is essential to the building’s structure. The inspector will look at the footing and foundation of the home. Signs of foundation issues include cracks in walls and doors that fail to latch or that jam.
  9. Plumbing Problems: It’s rare for an inspector not to not find at least one plumbing problem. These can include anything from dripping faucets to slow drains. Fortunately, these issues are usually easy and inexpensive to fix. It’s major ones you need to worry about.
  10. Defective Masonry: Chimney cracks are among the most common masonry problems. In most cases, these occur over time due to the weather. If the inspector discovers cracks that start at the chimney’s base and go upward, there could be a serious structural problem.

The good news about a failed home inspection is that almost any problem can be fixed. Mold can be remediated and a qualified electrician can remove and replace amateur wiring. The best option for a seller who has had problems uncovered by an inspection is have them fixed. The other option is to not fix the issues and to sell the home at a lower price. The problem with that second option is that the seller may inadvertently discount the home for more than the cost of repairing the issues. Also, homebuyers may be reluctant to invest in a property that will need immediate repairs.

What Mold Removal and Mold Inspections Are All About

If you see spots of mold, have signs of chronic moisture and/or detect a musty odor in your home or business, you should contact a mold removal in Charleston, SC before you spend money on mold testing. The company will give you a free evaluation of the situation and have the experience to tell you whether you have a problem or not. If they indeed do advise you to get further testing, you would then need to hire a certified mold assessment consultant to inspect and collect samples from the area for mold testing.

Mold Can Be Sneaky and Prevalent

Mold affects indoor air quality, and, unfortunately, can grow very quickly. In fact, mold can begin to grow in a home with humidity over 60% in under 48 hours. Mold can even grow and thrive in cold spaces, such as a refrigerator, as long as the temperature is above 40-degrees Fahrenheit. “Hidden” rot can also secretly grow in fiberglass insulation, and behind wallpaper and drywall. Even though you may not be able to visibly see the rot, it doesn’t mean that it’s not there and causing damage to your home and your health.

Serious Effects of Mold Growth

The presence of mold in a home has many negative effects. People can be exposed to rot through direct skin contact, breathing, or ingestion. Mold exposure can cause a number of health-related issues, including breathing difficulties, asthma and topical skin rash. Black mold is rare but highly-toxic and contains carcinogenic mycotoxins that are linked to certain types of cancer, liver and nervous system damage, and more.

Mold can also cause structural damage and destroy the value of your home– no one wants to buy or move into a home with a serious mold problem!

Mold growth can also seriously impact your wallet for two reasons: 1) if left in-tact, mold will continue to grow and become increasingly expensive to remove; and 2) due to a rising number of rot-related lawsuits, many home insurance companies now exclude mold insurance from homeowner policies.

When all the mold is removed and the cleanup and disinfecting has been completed, the inside of the containment area will be HEPA vacuumed and sealed, and air scrubbers will be used until the mold assessment consultant takes samples for clearance testing. If any part fails testing it will be reclined under the same containment. Once final clearance is given the containment is removed and the certificate of mold remediation is filled out by the consultant and the mold remediation company.

The Right Pest Control For Wasps

Wasps

Wasps are grouped into two categories: social wasps and solitary wasps. Social wasps (i.e., yellow jackets, bald-faced hornets and paper wasps) live in groups, defend their nests and take care of their young together. Solitary wasps (i.e. mud-daubers, cicada-killers, spider wasps, and potter wasps) form individual nests; act non-aggressively unless provoked; and sting to paralyze their prey (flies, caterpillars, spiders, etc.) and to defend their nests.

Paper wasps ( Polistes exclamans ) are ¾-1″ in length and have a slender, spindle shaped abdomen. They are long-legged and variously colored (yellow, brown, black and/or red). Paper wasps prey upon various garden pests. However, they do sting in defense of their nest.

Yellowjackets ( Vespula spp. ) are smaller (½-¾”) and much stockier than the paper wasp. They have black and yellow, banded markings on the abdomen. Yellowjackets designate members of their colony to defend the nest and are more aggressive than paper wasps. Colony guards can be disturbed by even the slightest vibration and will defend the nest vigorously and may call upon other members of the colony to attack.

Bald-faced hornets ( Dolichovespula maculata )are also slightly smaller (½-¾”) than a paper wasp. They are stockier than yellowjackets and are black with white/ivory markings on their face, thorax, and the tip of their abdomen. Bald-faced hornets aggressively protect their nest and also assign guards to guard the colony.

Wasp Removal Near Me

Our local pest control solutions are designed to get to the root of your concern and gets rid of typical pests while also stopping new ones from turning up. We focus on offering year-round insect control services in homes, commercial buildings, and other grounds in nearby areas. We perform pest control services to get rid of wasps and other aggravating pests. Our wasp control specialists are trained to utilize the most sophisticated pest-control technology and are committed to deliver trusted, quality service. Whatever your reason for trying to find pest control solutions , we are committed to delivering efficient solutions that are safe for your house, family, pets and the environment, so you will not have to be concerned about there being adverse effects to your pest control experience.


Identifying Wasps by Physical Characteristics

Look for yellow and black. Identify Yellowjackets and European paper wasps by the yellow and black bands on the wasps’ abdomens. Cicada killers are a type of digger wasp that resembles a larger, wider yellowjacket. Identify the European hornet by its yellow and black striped tail and red-brown thorax. You’ll also see black and yellow mud daubers.

Identify wasps with other coloration. Paper wasps native to North America are golden brown with patches of red and yellow. Distinguish these from the baldfaced hornet, which is white and black striped with a white face. Also look for digger wasps, which have orange-brown, yellow and black bodies and metallic blue wings.

Estimate the wasp’s size. Look for 0.5 inch (1.27 cm) long yellowjackets. Contrast these with larger wasps, including the 0.75 to 1.2 inch (1.9 to 3 cm) long baldfaced hornets, 0.75 to 1.4 inch (1.9 to 3.5 cm) long European hornet, and the significantly larger 1 to 2.5 inch long (2.54 to 6.35 cm) tarantula hawks and 1.5 inch (3.81 cm) long cicada killer. Paper wasps and mud daubers tend to be 0.5 to 0.75 inches (1.27 to 1.9 cm) long.

Observe the body shape. With some rare exceptions — like the European hornet — wasps can be identified by their smooth, hairless bodies and narrow waists. Learn to recognize the yellowjacket by its short, narrow waist and cone-like abdomen that tapers to a sharp point. Look for the characteristically long legs and spindle-shaped waist of the paper wasp. Also note the mud dauber has a very narrow waist and long, thin body.

Neutralize Nests Naturally

Nests are easiest to locate on warm summer mornings or evenings by carefully scanning the landscape for insects shooting up out of the ground. After you have located yellow jacket nests, decide whether they will stay or go. To neutralize a nest without using pesticides, cover the entry hole with a large translucent bowl or other cover, held in place with a brick. Be sure to approach yellow jacket nests at night, when the yellow jackets are at rest. Use flags or other markers to mark the locations of nests in acceptable places.

WHEN it’s a warm summer day, there’s nothing like a picnic or barbecue in the sunshine.

But for many outdoor eating can quickly become a bit of a nightmare at this time of year with the buzzing sound of a wasp heading your way.

Wasps are normally natural pest controllers and tend to eat other insects.

During August and September their attentions turn to sweet food making them much more of a nuisance.